Blog

When Is Skin Care Too Young? Exploring the Safety Concerns

Many people ask, when to start skincare? While good skincare habits begin early, using the right products at the right age is essential for long-term skin health.

Did you know that children as young as eight are now embracing skincare routines? This trend has sparked debates about whether such early adoption is harmful or beneficial. Social media platforms like TikTok and YouTube are flooded with videos of kids enthusiastically purchasing luxury skincare products, raising concerns among parents and dermatologists.

Recent studies indicate that many skincare products contain active ingredients like exfoliating acids and retinol, which are intended for adult use. These ingredients can potentially harm younger, more delicate skin, leading to irritation or allergic reactions. Dr. Tess McPherson, a pediatric dermatologist, emphasizes that young skin requires minimal care.

While some argue that a basic skincare routine can be beneficial, others warn against the use of adult-oriented products. Drunk Elephant’s founder advises against children using potent products. The lack of age restrictions on purchasing skincare products makes them easily accessible to minors, adding to the concern.

When to Start Skincare – Finding the Right Age

  • Children as young as eight are using skincare products, raising safety concerns.
  • Skincare products often contain adult-oriented ingredients that may harm young skin.
  • Experts recommend minimal skincare for children to avoid potential damage.
  • Social media influences kids to purchase luxury skincare products.
  • There are no age restrictions on buying skincare products, making them accessible to minors.

Understanding Early Skincare Trends and Social Media Influence

Social media has become a powerful force in shaping the beauty routines of the younger generation. Platforms like TikTok and YouTube are filled with videos of kids enthusiastic about their skincare routines, a trend that has grown significantly over the past few years.

Rise of “Sephora Kids” on Social Platforms

The phenomenon of “Sephora Kids” has taken the beauty world by storm. These young users create engaging content around their skincare routines, often showcasing high-end products. Social media influencers have played a significant role in normalizing this trend, making it appealing for children to adopt elaborate skincare regimens.

Recent videos feature kids as young as eight sharing their favorite cleansers and serums. This trend not only reflects a shift in how young consumers engage with beauty products but also highlights the influence of online communities in shaping their preferences.

When to Start Skincare for Pre-Teens & Teens

While some see this as a positive step towards self-care, others raise concerns about the suitability of these products for young skin. Many skincare products contain active ingredients like retinol and exfoliating acids, which are designed for adult use. These ingredients can potentially harm younger, more delicate skin, leading to irritation or allergic reactions.

Influencers and online content often shape early skincare purchase decisions. However, there’s a risk of misunderstanding the role of certain ingredients. For instance, while vitamin C is marketed as beneficial, its overuse can lead to sensitivity in young users.

Experts like Dr. Tess McPherson, a pediatric dermatologist, emphasize that young skin requires minimal care. She advises against the use of potent products, suggesting that gentle, hydrating cleansers and moisturizers are more appropriate for children.

When is too young skin care products? Is it safe? Fact or myth

Early skincare routines have sparked debates about their impact on young users. While some believe it’s a positive step, others worry about potential harm. Dr. Tess McPherson, a pediatric dermatologist, warns that young skin may not need complex products.

Retinol, a common anti-aging ingredient, is often questioned for young users. Studies show that using such ingredients too early can cause irritation. Media reports highlight cases where young users experienced adverse effects from potent products.

Anti-aging products are mostly designed for adult skin concerns. Experts advise that young skin doesn’t need these treatments. Media influencers often promote these products, but their suitability for young users remains uncertain.

While some argue that a basic routine can be beneficial, others stress caution. Dr. McPherson recommends gentle cleansers and moisturizers for young skin. The lack of age restrictions on skincare products makes them easily accessible to minors, adding to concerns.

Risks of Using Adult Skincare Products on Children

Skincare trends among children have raised concerns about the suitability of adult products for young users. Many parents and experts worry about the long-term effects of these products on delicate skin.

Potential Damage from Active Ingredients

Active ingredients like retinol and chemical exfoliants, common in adult products, can disrupt a child’s natural skin barrier. These ingredients, designed for mature skin, may cause irritation or allergic reactions in children.

Over time, using multiple active ingredients can lead to cumulative damage. Experts warn that this could result in long-term skin problems, especially for children with sensitive skin or conditions like eczema.

Even beneficial products, such as sunscreen, require careful formulation for young users. While essential for protection, certain ingredients in adult sunscreens might not be suitable for children, emphasizing the need for age-appropriate formulations.

Dr. Tess McPherson, a pediatric dermatologist, advises against using potent products on children. She recommends sticking to gentle cleansers and moisturizers, suggesting that young skin doesn’t need complex treatments.

This trend highlights the importance of understanding ingredient interactions and their effects over time. Parents should consult with dermatologists to ensure their children’s skincare routines are both safe and effective.

Expert Opinions on Child Skincare

Leading dermatologists and skincare experts are weighing in on the growing trend of young children adopting skincare routines. While some view it as a positive step toward self-care, others caution against the potential risks of using adult-oriented products on delicate young skin.

Insights from Dermatologists

Michele Green, MD, and Joshua Zeichner, MD, both emphasize the importance of minimal skincare for children. They warn that many adult products contain active ingredients like retinol and chemical exfoliants, which can cause irritation and long-term damage to young skin. Dr. Green notes that children’s skin requires gentle, hydrating cleansers and moisturizers rather than potent treatments.

Parental Concerns and Medical Advice

Parents are increasingly concerned about the suitability of skincare products for their children. Experts recommend a basic routine consisting of a gentle cleanser, moisturizer, and sunscreen. Dr. Zeichner stresses the importance of consulting a dermatologist if children experience any skin issues. This approach ensures that young users avoid harsh ingredients while still benefiting from essential protection and hydration.

By following expert advice, parents can help their children adopt safe and effective skincare practices that promote healthy, resilient skin without the risks associated with adult products.

Implementing a Safe and Basic Skincare Routine for Kids

Creating a skincare routine for children can be straightforward when focusing on essentials. A gentle cleanser, moisturizer, and sunscreen form the foundation of a safe and effective regimen.

Choosing Gentle Cleansers and Moisturizers

Gentle, non-comedogenic cleansers are ideal for young skin, as they clean without causing irritation. Moisturizers should be lightweight and hydrating, avoiding harsh chemicals that can disrupt the skin’s natural balance.

When selecting products, look for formulations designed for sensitive skin or specifically for children. Avoid adult products with active ingredients like retinol or exfoliating acids, which can be too harsh for young skin.

The Role of Sunscreen Protection

Sunscreen is a non-negotiable part of daily skincare, even for children. It prevents long-term damage and promotes healthy skin. Opt for a broad-spectrum sunscreen with SPF 30 or higher, designed for young skin.

Apply sunscreen 15-30 minutes before going outside and reapply every two hours. Teach children to make it a habit, just like brushing their teeth.

By sticking to these basics, parents can help their children maintain healthy, resilient skin without exposing them to unnecessary risks. Remember, less is often more when it comes to skincare for kids.

The Impact of Social Media and Influencer Trends

Social media platforms like TikTok and YouTube have become powerful tools in shaping beauty trends, especially among young users. Influencers, often referred to as “skinfluencers,” are driving the adoption of skincare routines, sometimes promoting products that may not be suitable for young users.

TikTok and YouTube’s Role in Shaping Ideas

TikTok and YouTube have created a space where influencers showcase their skincare routines, often using adult-oriented products. These influencers, many of whom have millions of followers, are shaping perceptions of what constitutes proper skincare. This trend has led to children emulating adult skincare practices seen online, potentially using products like retinol and exfoliating acids, which can be harmful to young users.

Popular content on these platforms often advocates for the use of products not meant for young users. For instance, many videos feature children using anti-aging creams and chemical exfoliants, which are designed for adult skin concerns. This trend highlights the need for education over the mimicry of risky routines.

Platform Influence Risk
TikTok Hashtags like #GRWM (Get Ready With Me) have over 150 billion views, promoting skincare routines. Encourages the use of adult products like retinol and exfoliating acids.
YouTube Popular among teens for detailed skincare tutorials and product reviews. Often features products with active ingredients unsuitable for young users.

While social media can be a positive force for self-care, it’s crucial to emphasize education and caution. Parents and educators should guide young users to make informed decisions, avoiding the misuse of adult skincare products.

When to start skincare: Safe and age-appropriate skincare tips for beginners.

Understanding Key Skincare Ingredients

Skincare ingredients play a crucial role in determining the safety and effectiveness of a routine, especially for children. While many ingredients are safe for adults, they can pose risks for younger users.

Risks of Retinol and Chemical Exfoliants

Retinol, a common anti-aging ingredient, can be too harsh for young skin. It may cause irritation or allergic reactions, making it unsuitable for children. Similarly, chemical exfoliants like alpha-hydroxy acids (AHAs) and beta-hydroxy acids (BHAs) can disrupt the delicate skin barrier of a child.

These ingredients are designed for adult skin concerns, such as wrinkles and acne, which children rarely experience. Using them on young users can lead to unnecessary irritation and potential long-term damage.

When selecting skincare products for children, it’s essential to choose gentle, hydrating cleansers and moisturizers. Avoid adult-oriented products with active ingredients like retinol or exfoliating acids, as they are too harsh for young users.

Key Points to Remember:

  • Retinol and chemical exfoliants can harm young users.
  • Gentle, hydrating products are best for children.
  • Always consult a dermatologist if unsure about ingredients.

By understanding these ingredients and their effects, parents can make informed decisions to protect their children’s delicate skin.

Age-Appropriate Skincare Practices

As children grow, their skincare needs evolve. Understanding when to transition from child to teen products is key to maintaining healthy skin. This section explores how to make this transition smoothly and safely.

When to Transition from Child to Teen Products

The tween years, typically between ages 10-12, mark a significant change in skin due to hormonal shifts. At this stage, parents should consider introducing products designed for tweens, which are formulated to address emerging concerns like increased oiliness and sensitivity.

Dr. Michele Green and Dr. Joshua Zeichner recommend using gentle, hydrating cleansers and moisturizers. These products help maintain the skin’s natural barrier without causing irritation. Avoid adult products with active ingredients like retinol or exfoliating acids, as they can be too harsh for young skin.

Parents play a crucial role in guiding their child’s skincare routine. As their child’s face and skin change, it’s important to monitor and adjust products accordingly. Consulting a dermatologist can provide personalized advice, ensuring the routine remains safe and effective.
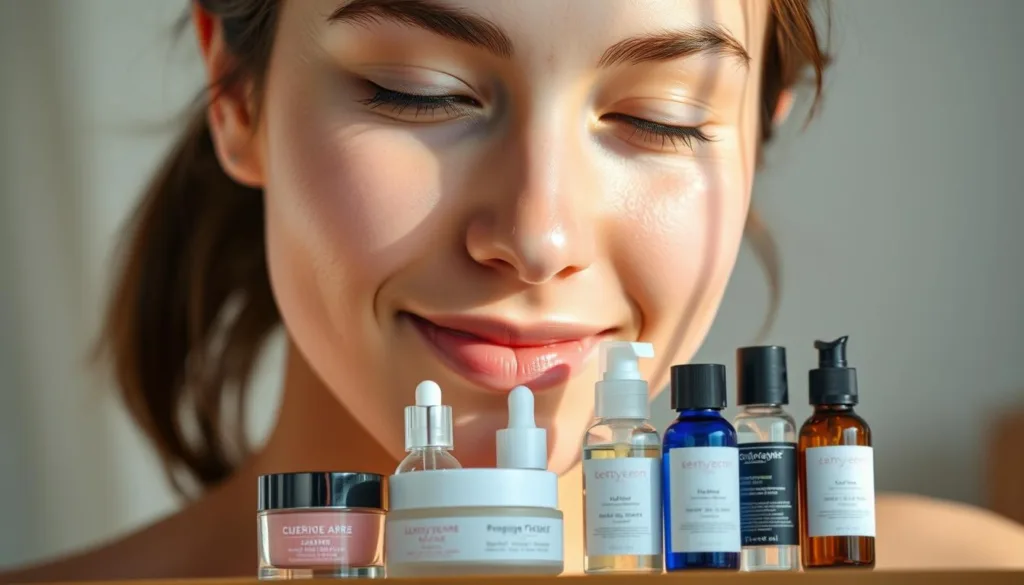
age-appropriate skincare

Parental Guidance and Professional Consultation

Parental involvement is crucial in maintaining healthy skincare habits for children. As young users explore various routines, expert advice becomes essential to ensure their safety and effectiveness.

When to Seek a Dermatologist’s Advice

It’s important for parents to recognize when their child’s skincare needs professional attention. A dermatologist can offer tailored advice, helping to address specific concerns effectively.

There are clear signs that indicate it’s time to consult a dermatologist. If your child experiences persistent irritation, allergic reactions, or unusual skin changes, seeking expert help is advisable. These signs often suggest that a product or routine may not be suitable for their sensitive skin.

Signs to Consult a Dermatologist Importance
Persistent irritation or redness Indicates potential allergic reactions or product incompatibility.
Allergic reactions or rashes May signal sensitivity to ingredients, requiring professional evaluation.
Unusual skin changes Could be early signs of conditions needing medical attention.

Proper use of moisturizers plays a key role in protecting and soothing young skin. Opt for non-comedogenic, gentle formulations to avoid clogging pores and maintain hydration without irritation.

Being proactive in following professional recommendations ensures that children adopt safe and effective skincare practices. Regular consultations and open communication with dermatologists can prevent potential issues and promote healthy, resilient skin.

Marketing, Packaging, and Their Effects on Young Consumers

The allure of vibrant packaging and persuasive marketing messages has become a significant factor in shaping the skincare preferences of children and tweens. Brands are increasingly using bright, engaging designs and catchy slogans to capture the attention of younger audiences, often appealing to their desire for trendy and adult-like products.

How Branding Captivates Young Audiences

Brands like Drunk Elephant and e.l.f. Cosmetics have mastered the art of appealing to younger demographics through colorful packaging and relatable marketing campaigns. These strategies often create a sense of excitement and urgency, encouraging young consumers to try products they see promoted by influencers or popular on social media.

Platform Influence Risk
TikTok Hashtags like #GRWM (Get Ready With Me) have over 150 billion views, promoting skincare routines. Encourages the use of adult products like retinol and exfoliating acids.
YouTube Popular among teens for detailed skincare tutorials and product reviews. Often features products with active ingredients unsuitable for young users.

While expert opinions matter in guiding skincare choices, sound practice and informed decisions are paramount to keep skin safe. Parents should educate their children on distinguishing appealing packaging from functional product value, ensuring they understand the importance of gentle, hydrating cleansers and moisturizers.

Conclusion

In conclusion, our review combines insights from dermatologists, parents, and media to highlight that early skincare should be approached with caution. Many concerns are rooted in facts, dispelling myths about early routines.

Key points to remember: Skincare should be introduced safely, focusing on gentle, hydrating cleansers and moisturizers. Avoid products that may cause irritation or wrinkles, as they are often designed for adult use.

Messages from trusted sources like dermatologists and brands such as Sephora emphasize the importance of safety and evidence-based practices. By prioritizing these principles, parents can help children maintain healthy, resilient skin without unnecessary risks.

FAQ

What age is considered too young for skincare products?

Most dermatologists agree that children under the age of 6 don’t need formal skincare products. However, gentle cleansing and moisturizing can be beneficial for sensitive skin. Always consult a pediatric dermatologist before introducing new products.

Are skincare products safe for young children?

It depends on the ingredients. Harsh chemicals like retinol or acids can irritate a child’s delicate skin. Stick to fragrance-free, hypoallergenic products designed for sensitive skin. Always patch test and consult a doctor if unsure.

Is the trend of young kids using skincare just a social media myth?

Social media platforms like TikTok and YouTube have popularized skincare routines, even among young audiences. While some trends are harmless, they can lead to overuse of unnecessary products. Parents should guide their children to avoid potential harm.

What ingredients should parents avoid in kids’ skincare products?

Avoid products containing retinol, salicylic acid, or artificial fragrances. Opt for gentle, non-comedogenic cleansers and moisturizers. Always read labels and consult a dermatologist if unsure.

Can young children develop skincare routines like adults?

Simple routines, like washing with a gentle cleanser and applying sunscreen, can be introduced. However, complex regimens with multiple steps are unnecessary and may cause irritation. Keep it simple and age-appropriate.

How does social media influence kids’ skincare habits?

Social media often creates unrealistic expectations and encourages early adoption of skincare trends. Parents should educate their children about the importance of healthy habits over product-focused routines.

What’s the best way to protect a child’s skin from the sun?

Use broad-spectrum sunscreen with at least SPF 30 daily, even on cloudy days. Hats and protective clothing also provide excellent protection. Make it a habit to apply sunscreen before outdoor activities.

Can teens use the same skincare products as adults?

Teens can use some adult products, but certain ingredients like retinol or exfoliants may be too harsh. Start with gentle formulations and gradually introduce stronger products under dermatologist guidance.

How should parents choose skincare products for their kids?

Look for products labeled as hypoallergenic and fragrance-free. Avoid harsh chemicals and opt for brands recommended by pediatricians or dermatologists. Always test on a small area first.

When should a child see a dermatologist for skincare concerns?

If your child experiences persistent acne, irritation, or skin sensitivity, consult a dermatologist. They can provide personalized advice and treatments tailored to your child’s needs.

Do skincare brands target kids with their marketing?

Yes, some brands use colorful packaging and kid-friendly messaging to attract younger audiences. Parents should remain cautious and focus on the product’s ingredients rather than the marketing appeal.
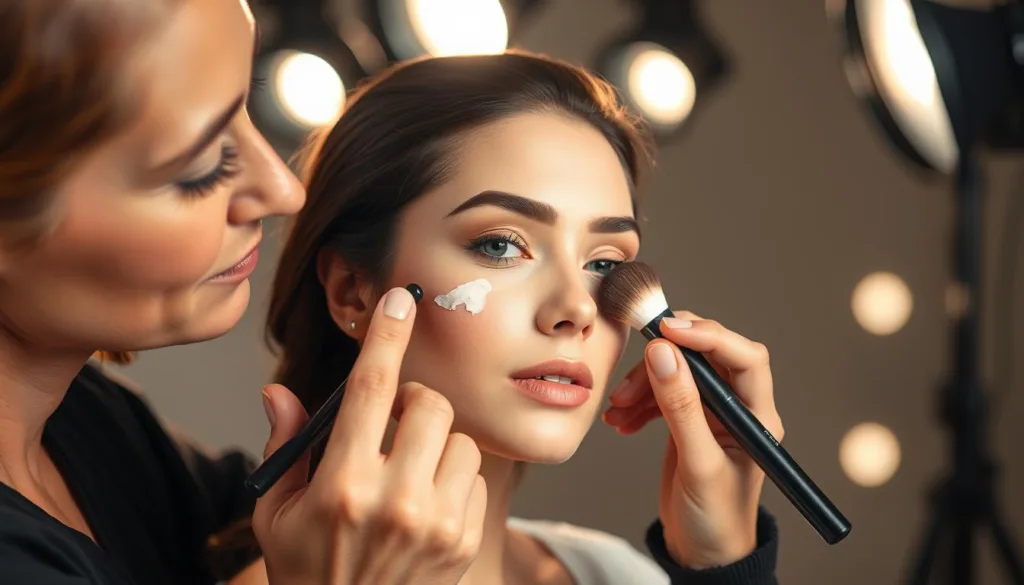
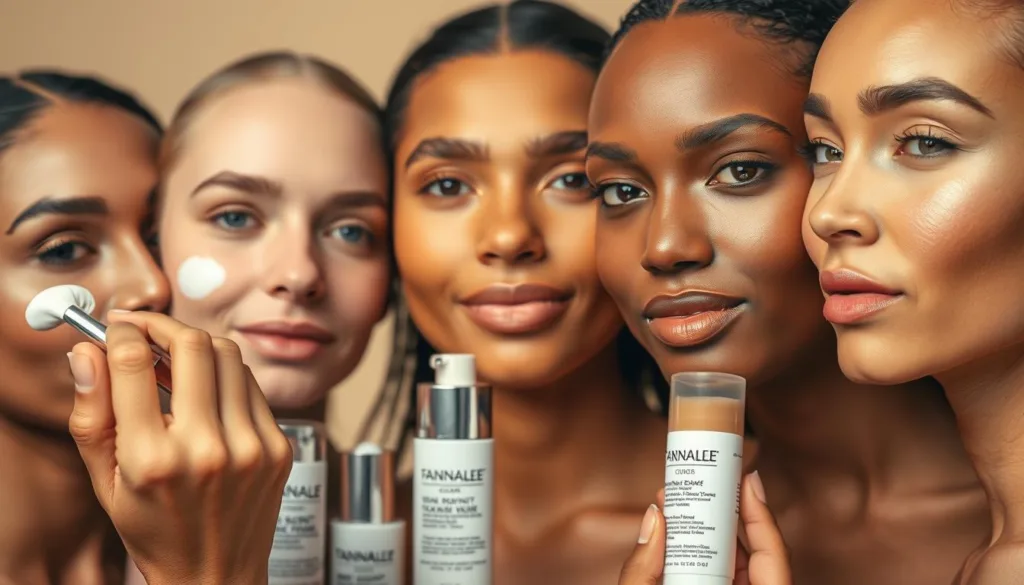
Primer 101: Everything You Need to Know About Primer

Imagine starting your day with a flawless, long-lasting makeup look that turns heads. For many, this is where primer comes into play—a game-changer in any beauty routine. But what exactly is primer, and why is it so essential?

Primer is more than just a prep step; it’s the foundation of a perfect makeup base. It creates a smooth canvas, reducing the appearance of pores and imperfections. Whether you’re aiming for a natural look or full coverage, primer ensures your makeup stays fresh and vibrant all day long.

From hydrating to mattifying, there’s a primer for every skin type. It’s not just about extending wear; it’s about enhancing your natural beauty. In this guide, we’ll explore the ins and outs of primer, helping you unlock its full potential.

Best Techniques on How to Use Makeup Primer for Different Skin Types

  • Primer creates a smooth surface for makeup application.
  • It extends the wear of your makeup throughout the day.
  • There are various types of primer for different skin concerns.
  • Using primer can boost your confidence in your beauty routine.
  • Primer is a crucial step for achieving a flawless makeup base.

How to Use Makeup Primer for a Flawless Base

Discover the secret to a flawless makeup look that lasts all day. Primer is a essential step in your beauty routine that ensures your makeup stays fresh and vibrant. It’s more than just a base layer—it’s the key to unlocking a smooth, even finish.

How to Use Makeup Primer to Keep Your Makeup Fresh All Day

Primer acts as a bridge between your skin and makeup, creating a perfect canvas for foundation. By minimizing the appearance of pores and fine lines, it helps your makeup stay in place longer. This means fewer touch-ups and a more polished look throughout the day.

Benefits of Using a Primer Daily

Incorporating primer into your routine offers multiple benefits. It not only extends the wear of your makeup but also reduces shine and creates a smoother surface for your foundation. With the right primer, you can address specific skin concerns, whether you’re looking to hydrate, mattify, or brighten your complexion.

Using a primer daily can also prevent common makeup issues like patchiness and excessive oiliness. It’s a simple step that makes a big difference in how your makeup looks and feels. By choosing the right formula for your skin type, you can ensure your makeup stays flawless and your skin remains healthy.

Preparing Your Skin for a Flawless Makeup Base

Achieving a flawless makeup look begins long before you pick up your makeup primer. Preparing your skin properly ensures that your makeup applies smoothly and lasts all day. A well-crafted skincare routine and good hygiene practices are essential for creating the perfect canvas.

Establishing a Solid Skincare Routine

A consistent skincare routine is the cornerstone of a flawless makeup base. Start with a gentle cleanser to remove dirt and impurities, followed by a moisturizer tailored to your skin type. For oily skin, a lightweight, oil-free moisturizer is ideal, while dry skin benefits from a rich, hydrating formula.

Allow your moisturizer to absorb fully—about one to two minutes—before applying your makeup primer. This waiting period ensures your skin is ready to receive the primer evenly. A proper skincare routine not only enhances the application of your makeup but also supports the overall health of your skin.

Step Action Details
1 Cleanse Use a gentle cleanser to remove dirt and impurities.
2 Moisturize Apply a moisturizer suited to your skin type.
3 Wait Allow moisturizer to absorb for 1-2 minutes.
4 Prime Apply a pea-sized amount of primer.

Clean Hands and Safe Application Practices

Clean hands are crucial when applying makeup primer. Dirt and oils from your hands can transfer to your face, disrupting the primer’s effectiveness. Use clean, dry hands to apply your primer, focusing on areas where pores are most visible, such as the T-zone.

Gently pat the primer onto your skin with your ring finger, especially around the delicate eye area. Avoid rubbing vigorously, as this can irritate the skin. After applying, wait a minute or two before moving on to foundation to ensure the primer is fully absorbed.

Remember, even the best makeup primer can’t compensate for poor skincare habits. By combining a solid skincare routine with clean application practices, you’ll create a smooth, even canvas for your makeup that lasts all day.

How to apply primer? What is primer?

Unlocking the full potential of your makeup starts with proper primer application. Whether you’re aiming for a natural look or full coverage, the right technique ensures a smooth, even base that lasts all day. Let’s dive into the step-by-step process and expert tips to help you make the most of your primer.

Step-by-Step Primer Application Process

Allow the primer to absorb fully for about one to two minutes before applying foundation. This waiting period is crucial to prevent pilling and ensure proper adhesion of your makeup. Remember, the key is to create a smooth canvas for your makeup to adhere to, resulting in a polished look that lasts throughout the day.

Tips for Using the Right Amount

Choosing the right amount of primer is just as important as the application technique. Start with a small amount and build up as needed. Using too much can lead to a heavy, cakey finish, while too little may not provide adequate coverage. Focus on problem areas like the T-zone and fine lines, where imperfections may be more noticeable.

For dry skin, opt for a hydrating primer with ingredients like hyaluronic acid. If you have oily skin, consider a silicone-based mattifying primer to control shine. Remember, the goal is to enhance your natural beauty while ensuring your makeup stays fresh and vibrant all day long.

Step Action Details
1 Apply Primer Use a pea-sized amount and pat gently onto the skin.
2 Blend Use fingers, brush, or sponge for even coverage.
3 Wait Allow primer to absorb for 1-2 minutes.
4 Proceed Apply foundation and the rest of your makeup.

Tips and Techniques from Professional Makeup Artists

Mastering the art of primer application can elevate your makeup game. Professional makeup artists like Juliette Perreux and Lindsey Trop share their expertise to help you achieve a flawless finish.

Expert Advice on Application Tools and Tricks

When it comes to application tools, fingers are often the best utensils. They offer better control, especially around delicate areas like the eyes. For a more polished look, try using a brush or sponge. Remember, the goal is even blending for a natural effect.

Timing is crucial. Allow your primer to absorb for about a minute before applying foundation. This ensures a smooth finish and prevents pilling. For oily skin, opt for a mattifying primer to control shine. Hydrating formulas with hyaluronic acid are ideal for dry skin, creating a radiant effect.

Avoiding Common Primer Mistakes

One of the most common errors is using too much product. Start with a pea-sized amount and build up as needed. Applying excess primer can lead to a cakey finish. Another mistake is not waiting long enough before applying foundation, which can result in a patchy appearance.

Environmental factors also play a role. In humid climates, a lightweight, oil-free primer is best. In drier conditions, a hydrating primer helps maintain moisture. Adjusting your application based on these factors ensures a flawless finish all year round.

How to use makeup primer: A step-by-step guide for a smooth, long-lasting finish.

Customizing Primer Use for Different Skin Types

Every skin type has unique needs, and choosing the right primer can make all the difference. Whether you’re dealing with oily, dry, or mature skin, there’s a primer tailored to your specific concerns.

Strategies for Oily, Dry, and Mature Skin

For oily skin, a mattifying primer is your best bet. It helps control shine and minimizes pores. Dry skin benefits from a hydrating primer that locks in moisture. Mature skin, on the other hand, can gain from a primer with anti-aging properties that reduces wrinkles and fine lines.

Different skin types with primer

Professional makeup artists recommend adjusting the amount of primer based on your skin type. Oily skin needs a lightweight touch, while dry skin may require a slightly generous application. Always pat gently and focus on problem areas like the T-zone.

When it comes to wrinkles, silicone-based primers are a great option. They create a smooth canvas and fill in fine lines, giving your skin a youthful appearance. For a natural finish, blend your primer well and wait a minute before applying foundation.

Expert tips include using a hydrating primer for dry skin and a mattifying one for oily skin. These small adjustments can enhance your makeup’s staying power and keep your skin looking healthy all day.

Innovations in Primer: Achieving a Long-Lasting Look

Modern primers have evolved beyond mere makeup bases, offering multi-tasking benefits that enhance both skincare and cosmetics. These advancements ensure your makeup stays vibrant while addressing specific skin concerns.

Primer Formulas and Multi-Tasking Benefits

Today’s primers are designed to do more than just prepare your skin. They incorporate skincare ingredients like hyaluronic acid for hydration and antioxidants to combat aging. Whether you need to correct color or control shine, there’s a primer for every need.

Professional makeup artists often recommend silicone-based primers for their ability to smooth pores and extend makeup wear. For instance, the Tarte Poreless Mattifying Primer is a favorite among artists for its 12-hour mattifying effect, making it ideal for oily skin.

According to top makeup artist Lindsey Trop, “The right primer can transform your makeup look, ensuring it lasts all day while addressing your skin’s specific needs.”

Illuminating primers, such as those with light-reflecting particles, can brighten a dull complexion. They’re perfect for use alone or under foundation. Eye primers, formulated for delicate skin, enhance eyeshadow pigmentation and longevity.

With so many options available, choosing the right primer can seem overwhelming. However, by focusing on your skin type and specific concerns, you can select a primer that not only extends makeup wear but also improves your skin’s health and appearance.

Conclusion

In conclusion, mastering the art of primer usage can elevate your makeup game. As we’ve explored throughout this guide, the right primer serves as a solid foundation for all your makeup products. Whether you’re focusing on eye makeup or seeking a flawless base, a well-chosen primer ensures your look stays vibrant and polished.

By integrating primer into your daily routine, you can achieve a professional finish that lasts throughout the day. Remember, the key is to experiment with different formulas to find the one that best suits your skin type and beauty needs. From mattifying to hydrating options, there’s a primer designed to work in harmony with your skin.

Don’t forget to revisit our guide for further tips and updates on achieving the perfect makeup application. With the right techniques and products, you can unlock a world of beauty possibilities. Let your makeup work in your favor, and let your confidence shine through!

FAQ

What is primer and why is it important in makeup?

Primer is a base product applied before foundation to create a smooth canvas for makeup. It helps even out skin texture, minimizes pores, and ensures long-lasting coverage. Think of it as the foundation for your foundation!

How do I choose the right primer for my skin type?

Selecting the right primer depends on your skin concerns. For oily skin, look for oil-controlling formulas. If you have dry skin, opt for hydrating primers. Mature skin benefits from primers with anti-aging properties. Always check the product label for your specific needs.

Can I apply primer with my fingers or a brush?

Both methods work! Using your fingers allows for quick, even coverage, while a brush provides more precision. Choose what feels most comfortable for you and your routine.

How much primer should I use?

A little goes a long way! Use a small amount, about the size of a pea, to cover your entire face. Excess primer can feel heavy and cakey.

Do I need to wait before applying foundation after primer?

Yes, give it a minute! Allow the primer to set for about 30 seconds to a minute before applying foundation. This ensures a smooth, even finish.

Can primer help with wrinkles and fine lines?

Absolutely! Certain primers are formulated to blur fine lines and wrinkles, creating a more youthful appearance. Look for primers with smoothing or anti-aging benefits.

Is primer suitable for all skin tones and types?

Yes, there’s a primer for everyone! Whether you have oily, dry, combination, or sensitive skin, there’s a formula designed to meet your needs. Always patch test to ensure compatibility.

Can I use primer on my eyes or lips?

Yes! Eye primers help eyeshadow stay in place and bring out the color. Lip primers smooth and prepare your lips for lipstick or gloss, ensuring a flawless finish.

How often should I use primer?

Primer can be part of your daily makeup routine. Use it every time you apply foundation for the best results. If you’re going for a natural look, a lightweight primer can still enhance your complexion.

Are all primers the same in terms of finish?

No, primers vary in finish. Some offer a matte effect, while others provide a radiant or dewy look. Choose based on the final result you want for your makeup.

Can primer be used without makeup?

Yes! Primer can be worn alone to smooth and even out your skin tone, giving you a natural, polished look without any additional makeup.

False Lashes 101: Your Guide to Flawless Falsies

Mastering how to apply false lashes can instantly enhance your eye makeup and add drama to any look. This guide will walk you through easy application steps.

Have you ever struggled to achieve that perfect, glamorous look? You’re not alone. Many beauty enthusiasts find applying strip lashes to be a daunting task. But with the right techniques and tools, it’s easier than you think.

This guide will walk you through everything you need to know, from the basics to expert tips. Whether you’re a beginner or looking to refine your skills, we’ve got you covered. Learn how to measure, trim, and apply lashes like a pro.

One common mistake is not waiting long enough for the glue to become tacky. This can cause slipping and frustration. We’ll share the best practices to ensure your lashes stay put all day.

Precision is key. From choosing the right shape to blending with eyeliner, every step matters. Let’s start your journey to flawless falsies today.

Best Techniques on How to Apply False Lashes for Beginners

  • Mastering false lashes ensures a polished, professional look.
  • Always measure and trim the strip to fit your eye shape.
  • Wait 20 seconds for the glue to become tacky before applying.
  • Use tweezers or an applicator for precise placement.
  • Blend with eyeliner for a seamless, natural finish.

How to Apply False Lashes Like a Pro: Step-by-Step Guide

Getting the perfect fit for your lash strip is the foundation of a flawless look. Proper alignment and placement ensure a natural finish that enhances your eyes. Whether you’re a beginner or a pro, mastering these basics is essential.

Fitting Your Lash Strip to Your Eye

Start by aligning the strip with your natural lash line. If it’s too long, trim the outer corner using cosmetic scissors. This ensures the strip fits your eye shape perfectly. Always check the alignment before applying glue.

Proper placement is key. Focus on the inner and outer corners to avoid gaps. A well-fitted strip blends seamlessly with your natural lashes, creating a polished look.

Essential Application Tools

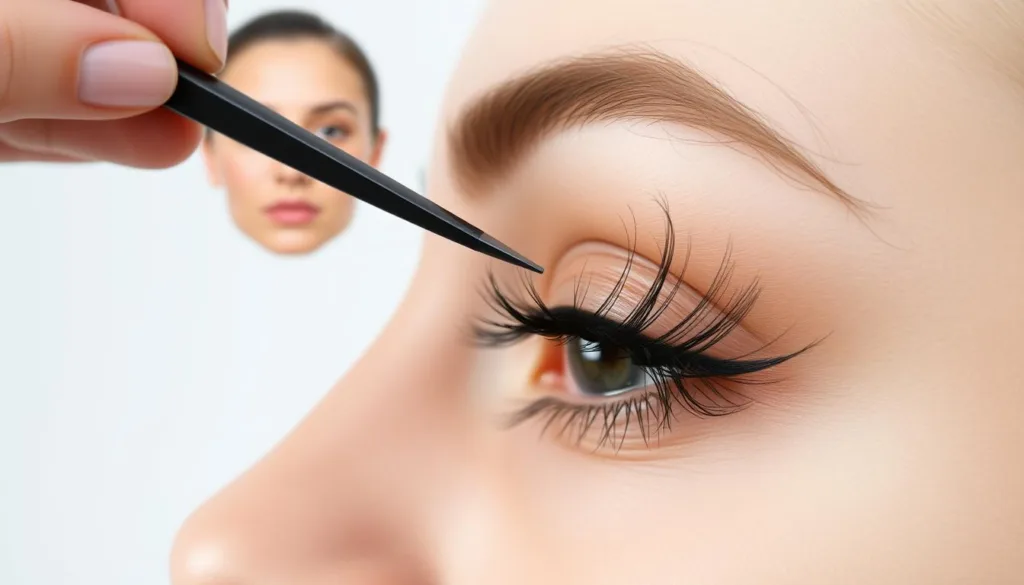
Using the right tools makes a big difference. Tweezers or a lash applicator help with precise placement. These tools ensure the strip adheres securely without slipping.

Wait 20 seconds for the glue to become tacky before applying. This step ensures the lash stays in place all day. Every tool and technique plays a role in achieving a flawless finish.

False lashes falsies 101: Mastering the Application Process

The secret to perfect lashes lies in how you prep and apply them. Proper preparation ensures they stay in place all day, while precise placement creates a natural, eye-catching look. Let’s dive into the essential steps to achieve flawless results.

How to apply false lashes: Step-by-step guide for long-lasting, natural-looking falsies.

Prepping Your Glue for Optimal Adhesion

Start by applying a thin line of glue along the strip lash. Wait 20 seconds for it to become tacky. This step is crucial to prevent lift-off during the day. A well-prepped glue ensures the lash adheres securely to your eye.

Using the right amount of glue is key. Too much can cause messiness, while too little may not hold. Focus on the top portion of the strip for even distribution. This way, the lash sits flush with your natural lash line.

Step-by-Step Placement Technique

Begin by placing the center of the strip lash on your eye. Use tweezers or an applicator for precision. Once the center is secure, slide the lash to the outer corners. This technique ensures proper alignment and a seamless finish.

Check the shape of the lash as you go. Slight adjustments may be needed to ensure it complements your eye. Focus on the outer edge to avoid gaps or unevenness. A well-placed lash enhances your overall look effortlessly.

Step Description
1 Apply a thin line of glue to the strip lash.
2 Wait 20 seconds for the glue to become tacky.
3 Place the center of the lash on your eye.
4 Slide the lash to the outer corners for alignment.
5 Adjust the shape to ensure a natural finish.

Enhancing the Look With Makeup Techniques

Achieving a flawless makeup look often hinges on the details. One of the most effective ways to elevate your lash game is by seamlessly blending your falsies with your natural lashes. This section dives into professional techniques to enhance your overall makeup look.

lash makeup techniques

Concealing the Lash Band with Eyeliner

Applying liquid or gel eyeliner along the lash line is a game-changer. It effectively hides the lash band, creating a natural finish. Draw the liner in a way that extends the band, blending it with your natural lashes.

For a polished look, focus on the top portion of the strip. This ensures the falsies sit flush with your lash line. A subtle bit of eyeliner can also accentuate your eye shape, adding depth and dimension.

Blending with Mascara

Mascara is optional but can further blend your natural lashes with the falsies. Apply it sparingly to avoid clumping. Some prefer to skip mascara for easier removal, but it’s a great way to unify the look.

Timing is crucial. Apply makeup over falsies carefully to avoid disturbing their placement. A steady hand and the right tools ensure a professional finish every time.

Whether you emphasize eyeliner or mascara depends on the intensity you want. For a natural look, stick to eyeliner. For added drama, combine both techniques. These expert tips complete your transformation effortlessly.

Exploring Alternative Lash Options

Exploring different lash options can transform your makeup routine. From dramatic to natural looks, the right choice depends on your eye shape and personal style. Understanding the variety available helps you achieve the perfect finish.

Different Lash Shapes and Styles

Lash shapes play a big role in your overall look. Round lashes create a doll-eye effect, while flared lashes offer a cat-eye appearance. Each style enhances your eyes in unique ways.

For a subtle enhancement, opt for shorter lengths. If you want drama, choose longer, voluminous styles. The shape you pick should complement your eye structure for the best results.

Choosing Between Strip, Mini, and Demi Lashes

Strip lashes are versatile and great for full coverage. Mini lashes are ideal for smaller eyes or glasses wearers. Demi lashes provide a natural, elongated look that’s perfect for everyday wear.

When shopping, consider trusted brands like Kiss or Ardell. These brands offer quality options that suit various preferences. Slight adjustments, like adding a second strip at the outer corner, can customize your look.

Mixing and matching styles allows you to experiment with different makeup looks. Understanding these options empowers you to explore new trends confidently.

Advanced Tips and Troubleshooting

Mastering advanced techniques can take your lash game to the next level. Whether you’re dealing with slippage or struggling with glue removal, these expert tips will help you achieve flawless results every time.

Strategies to Prevent Lash Slippage

One common issue is lash slippage, which can ruin your look. To prevent this, apply an extra dab of glue along the lash line. Wait 20 seconds for it to become tacky before placing the strip. This ensures a secure hold.

For added security, use a second layer of glue or switch to a stronger adhesive. Avoid oil-based products, as they can dissolve the glue. These small adjustments can make a big difference in keeping your lashes in place.

Effective Glue Removal Methods

Removing glue without damaging your lashes requires care. Start by gently peeling the strip from the outer corner. Use your nails or tweezers to lift the glue slowly. This prevents pulling off lash fibers.

If glue residue remains, use a cotton swab dipped in oil-free makeup remover. This method keeps your lashes intact and ready for reuse. Proper removal extends the life of your falsies.

Long-Term Maintenance Tips

To keep your lashes in top condition, store them in their original packaging. This protects them from dust and damage. Avoid using mascara on falsies, as it can reduce their lifespan.

Clean your lashes after each use to remove glue and makeup residue. Regular maintenance ensures they stay fresh and reusable. With proper care, high-quality lashes can last up to 15 wears.

Step Description
1 Apply extra glue to prevent slippage.
2 Wait 20 seconds for glue to become tacky.
3 Gently peel lashes from the outer corner for removal.
4 Use oil-free makeup remover for residue.
5 Store lashes in their original case for protection.

Conclusion

Mastering the art of lash application can elevate your makeup routine effortlessly. From prepping the glue to securing the strip along your lash line, every step matters. Proper alignment and blending with eyeliner ensure a seamless, natural finish.

Experiment with different styles to find what complements your eye shape. Brands like Ardell and Sephora offer quality options to suit your preferences. Don’t forget advanced tips like proper glue removal and long-term maintenance to keep your lashes in top condition.

Start with the right tools and techniques to make a significant difference. Whether you’re enhancing your natural look or going for drama, every detail counts. Shop for trusted products and explore new ways to perfect your lash game.

FAQ

How do I fit a lash strip to my eye?

Measure the strip against your lash line and trim any excess from the outer corner for a perfect fit. Always cut from the outer edge to maintain the natural shape.

What tools are essential for applying strip lashes?

You’ll need tweezers for precise placement, a mirror for visibility, and a steady hand. A lash applicator can also help with accuracy.

How do I prep the glue for better adhesion?

Apply a thin layer of glue to the lash band and wait 30 seconds until it becomes tacky. This ensures a stronger hold and easier placement.

What’s the best way to place strip lashes?

Start by positioning the center of the strip on your lash line. Then, press the inner and outer corners into place using tweezers or your fingers.

How can I conceal the lash band for a seamless look?

Use eyeliner to blend the band with your natural lash line. A liquid or gel liner works best for creating a smooth, cohesive appearance.

What are the differences between strip, mini, and demi lashes?

Strip lashes cover the entire lash line, mini lashes are shorter for a subtle effect, and demi lashes are half-strips for a more natural look.

How can I prevent my lashes from slipping?

Ensure your glue is tacky before application and press the strip firmly onto your lash line. Avoid applying too much glue, as it can weaken the hold.

What’s the safest way to remove lash glue?

Use a gentle oil-based makeup remover or a specialized adhesive remover. Apply it to a cotton pad and carefully dissolve the glue without tugging.

How do I maintain my lashes for long-term use?

Clean them after each use with a mild cleanser, remove excess glue, and store them in their original case to maintain their shape.

Classic Smokey Eyes in 5 Minutes or Less

Want to master how to do smokey eyes in just 5 minutes? This quick guide will help you achieve a sultry, blended look with minimal effort.

There’s something undeniably captivating about a smokey eye. It’s a makeup look that has stood the test of time, effortlessly blending drama and elegance. Whether you’re heading out for a romantic Valentine’s Day dinner or simply want to elevate your everyday style, this tutorial will show you how to achieve a flawless smokey eye in just a few steps.

With the right tools and techniques, creating this eye look is easier than you might think. A trusted black eye pencil, a blend of contrasting eyeshadows, and a good brush are all you need to get started. This guide will walk you through the process, offering expert tips to ensure your makeup looks professional and polished.

From preparing your lids to perfecting the lash line, every step is designed to simplify the process. Even if you’re short on time, this tutorial will help you achieve a dramatic look that’s perfect for any occasion. Let’s dive in and discover the beauty of a smokey eye that’s both accessible and versatile.

Quick Tips on How to Do Smokey Eyes Without Messing Up

  • Learn how to create a timeless smokey eye in just a few steps.
  • Discover essential products like a black eye pencil and contrasting eyeshadows.
  • Get expert tips for blending and achieving a professional finish.
  • Perfect your lash line and lid preparation for a polished look.
  • Transform your makeup routine with this versatile and dramatic eye look.

How to Do Smokey Eyes in 5 Minutes: Step-by-Step Guide

The foundation of a stunning eye look lies in proper preparation and quality products. Whether you’re aiming for a dramatic or subtle finish, having the right tools and a well-prepped canvas is essential. Let’s explore the must-have items and techniques to ensure your makeup stays flawless all day.

Gather Your Must-Have Products

To achieve a professional eye look, start with the basics. An eyeshadow primer is crucial to prevent creasing and ensure longevity. Pair it with a matte black eyeshadow and a black kohl pencil for depth and definition. Neutral powders and essential brushes, like a fluffy blending brush and a flat packing brush, are also key for seamless application.

Multi-use products can save time and money. For example, a neutral eyeshadow palette can double as a brow powder or contour shade. Investing in quality tools ensures precision and a polished finish.

Preparing Your Skin and Eyes for the Perfect Base

A well-prepped canvas is the secret to long-lasting makeup. Begin with a light foundation or concealer to even out your skin tone. Apply an eyeshadow primer to your lids to create a smooth base and prevent smudging. Groom your brows with a spoolie brush and fill in any sparse areas for a defined frame.

Attention to detail matters. Apply a nude eyeshadow base to help other shades blend harmoniously. Focus on the crease and lash line for a seamless transition between colors. These small steps make a big difference in achieving a professional look.

Product Purpose
Eyeshadow Primer Prevents creasing and enhances longevity
Matte Black Eyeshadow Adds depth and drama
Black Kohl Pencil Defines the lash line
Neutral Powders Creates a seamless transition
Essential Brushes Ensures precise application

By focusing on preparation and using the right products, you can create a flawless base for your eye makeup. This sets the stage for the next steps in achieving a stunning look.

Step-by-Step: Classic Smokey eyes under 5 minutes quick

Achieving a stunning eye makeup look doesn’t have to be time-consuming. With the right techniques, you can create a dramatic and polished style in just a few steps. This tutorial will guide you through the process, ensuring a flawless finish every time.

Priming, Lining, and Building the Base

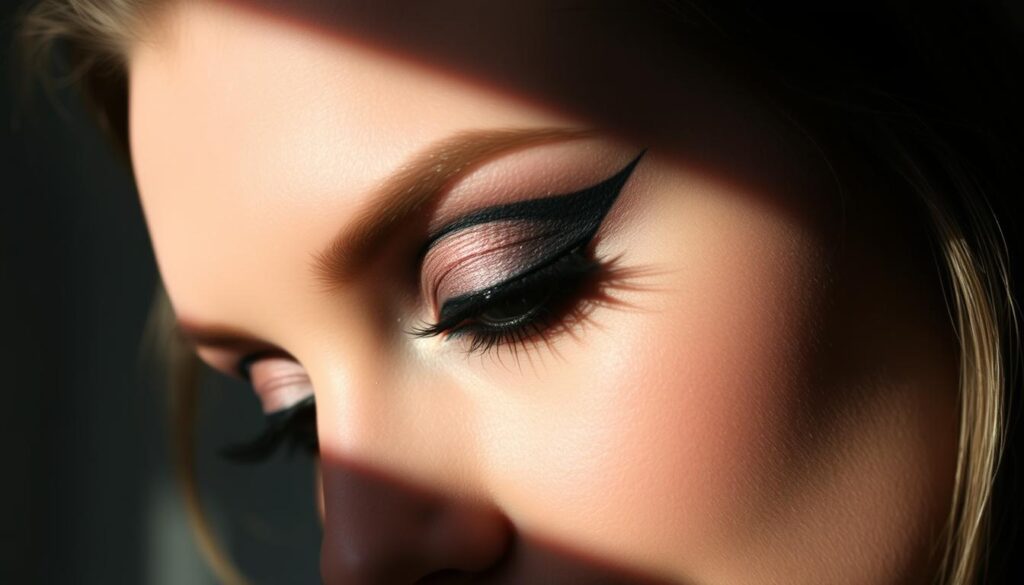
Start by applying an eyeshadow primer to your lids. This step ensures your makeup stays in place and prevents creasing. Next, use a black kohl pencil to line your upper lash line. Extend the line outward slightly for a subtle wing effect.

Pack a matte black eyeshadow onto your lid using a flat shader brush. Spread the color into the crease, focusing on blending rather than precision. This creates a solid base for the rest of your look.

How to do smokey eyes: A quick 5-minute makeup tutorial for a classic, blended look.

Seamless Blending and Highlighting Techniques

Use a clean blending brush with a lighter nude or charcoal powder to soften harsh lines. Blend the edges to create a gradient effect, ensuring a smooth transition between shades.

Incorporate highlighting techniques by applying a shimmery shade to your brow bone and inner corners. This step brightens your eyes and adds dimension to your makeup. According to top beauty educators, this technique is key to achieving a polished finish.

Product Purpose
Eyeshadow Primer Ensures longevity and prevents creasing
Black Kohl Pencil Defines the lash line
Matte Black Eyeshadow Creates depth and drama
Nude or Charcoal Powder Blends harsh lines seamlessly
Shimmery Highlight Brightens and adds dimension

By following these steps, you can achieve a perfect smokey eye in just a few minutes. Whether you’re preparing for a special occasion or enhancing your everyday style, this tutorial makes it easy to create a bold and beautiful look.

Makeup Tips to Elevate Your Smokey Eye Look

Enhancing your eye makeup with expert tips can transform your look effortlessly. Whether you’re aiming for a subtle daytime style or a bold evening appearance, these techniques will help you achieve a flawless finish. Let’s explore how to balance color and texture while adapting your makeup for any occasion.

Balancing Color and Texture for a Flawless Finish

To create a harmonious eye look, start by blending bold shades with neutral tones. Use a matte black eyeshadow for depth and pair it with a lighter powder to soften harsh lines. This balance ensures a seamless transition between colors.

Focus on the lash line for added definition. A black eyeliner can intensify the look, while a lighter shade on the inner corners brightens the eyes. According to Celebrity Makeup Artist Namrata Soni, “A well-blended eye look enhances natural beauty without overpowering it.”

makeup tips for smokey eye

Expert Hacks for Different Occasions and Intensities

Adapt your makeup to suit the occasion. For a daytime look, use lighter shades and minimal product. For a glamorous evening style, layer darker tones and add a touch of shimmer to the lid.

Pro tip: Apply a concealer after your eye makeup to clean up edges and prevent creasing. This simple step ensures longevity and a polished finish. Beginners can simplify the process by using a single pencil for both lining and smudging.

Experiment with textures to add dimension. A matte base paired with a highlight on the brow bone creates a balanced and professional look. These small adjustments make a big difference in achieving a stunning eye look.

Conclusion

Mastering a professional eye look is simpler than you think. With the right tools and techniques, you can create a polished style in no time. Proper preparation, like using a primer and quality brushes, ensures a flawless finish.

This guide combines practical product advice with expert tips to help you achieve a stunning result. Whether you’re aiming for a bold or subtle style, customization is key. Experiment with intensities and colors to match your personal beauty preferences.

Don’t be afraid to try this tutorial and share your results. Engage with our blog or social media to showcase your creativity. Remember, the power of makeup lies in its simplicity and attention to detail.

Embrace the process and enjoy transforming your look with confidence. A well-executed eye style can elevate your overall appearance, making you feel ready for any occasion.

FAQ

What products do I need for a smokey eye look?

Essential items include an eyeshadow primer, matte and shimmer eyeshadows, eyeliner, mascara, and blending brushes. Brands like MAC, Urban Decay, and Fenty Beauty offer great options for achieving this look.

How do I prepare my skin for a smokey eye?

Start with a clean, moisturized face. Apply an eyeshadow primer to your lids to ensure long-lasting color and prevent creasing. Use a concealer to even out your skin tone around the eyes.

What’s the fastest way to create a smokey eye?

Begin by applying a dark eyeshadow along your upper lash line and blend it into the crease. Add a lighter shade to the lid and highlight the inner corner. Finish with eyeliner and mascara for a polished look.

How can I make my smokey eye last all day?

Use a high-quality eyeshadow primer and set it with a translucent powder. Opt for long-wear formulas for eyeshadow, eyeliner, and mascara. Carry a makeup remover for quick touch-ups if needed.

Can I customize the smokey eye for different occasions?

Absolutely! For a daytime look, use softer shades like taupe or brown. For evening or Valentine’s Day, go bold with black or deep plum. Adjust the intensity by blending more or adding glitter for a festive touch.

What’s the best way to blend eyeshadow for a smokey eye?

Use a fluffy blending brush and work in circular motions to soften harsh edges. Start with lighter shades and gradually build up darker colors for a seamless transition.

How do I prevent fallout from dark eyeshadows?

Tap off excess product from your brush before applying. Use a tissue or makeup shield under your eyes to catch any fallout. Apply foundation after your eye makeup to clean up any mistakes.

What’s the secret to a perfect smokey eye for beginners?

Start with neutral shades and practice blending techniques. Use a smudge-proof eyeliner and focus on defining the upper lash line. Build confidence by experimenting with different textures and colors.

Translucent Powder: A Step-by-Step Guide

Wondering how to use translucent powder for a flawless finish? This step-by-step guide will help you master the art of setting makeup and controlling shine.

Bobbi Brown, a famous makeup artist, once said, “The right makeup can make you feel more confident and beautiful.” With over 300 million websites sharing tips on setting powder, it’s clear that translucent powder is key. It helps lock in makeup, preventing it from smudging or fading for up to 12 hours. This makes it a must for a flawless look.

Whether you’re new to makeup or have been using it for years, learning how to apply translucent powder is important. In this article, we’ll guide you through using translucent powder. You’ll learn how to get a flawless, airbrushed look that lasts all day. With the right techniques and tools, you can enhance your natural beauty.

Key Takeaways

  • Translucent powder is a versatile product that can be used to set foundation and concealer, reduce shine, and create a smooth finish.
  • Setting powder is essential for controlling shine, blurring imperfections, and extending the life of foundation and concealer.
  • There are two types of setting powder: pressed and loose, with pressed powder being more pigmented and suitable for dry skin.
  • Loose setting powder is recommended for oily skin as it contains oil-absorbing ingredients.
  • Applying setting powder correctly can prevent makeup from melting and creasing, with a focus on the T-zone (forehead, nose, chin).
  • Waiting at least three to five minutes for setting powder to set on the face is key for a flawless finish.

Understanding Translucent Powder and Its Benefits

Translucent powder is a key part of makeup, giving a flawless look. It sets foundation and concealer without changing skin color. This makes it perfect for all skin tones.

There are many types of translucent powder to choose from. Each has its own benefits. Loose powder is light and sheer, while pressed powder gives a fuller finish.

Translucent powder is great for makeup. It can make oily areas look matte, set eyeliner, and even make lashes look fuller. It’s a must-have in any makeup collection.

Brands like RCMA Makeup, rms beauty, and Hourglass offer excellent translucent powders. They help control oil, blur pores, and give a light finish.

Brand Product Price
RCMA Makeup No Color Powder $14
rms beauty “Un” Powder $36
Hourglass Veil Translucent Setting Powder $49

Essential Tools for Applying Translucent Powder

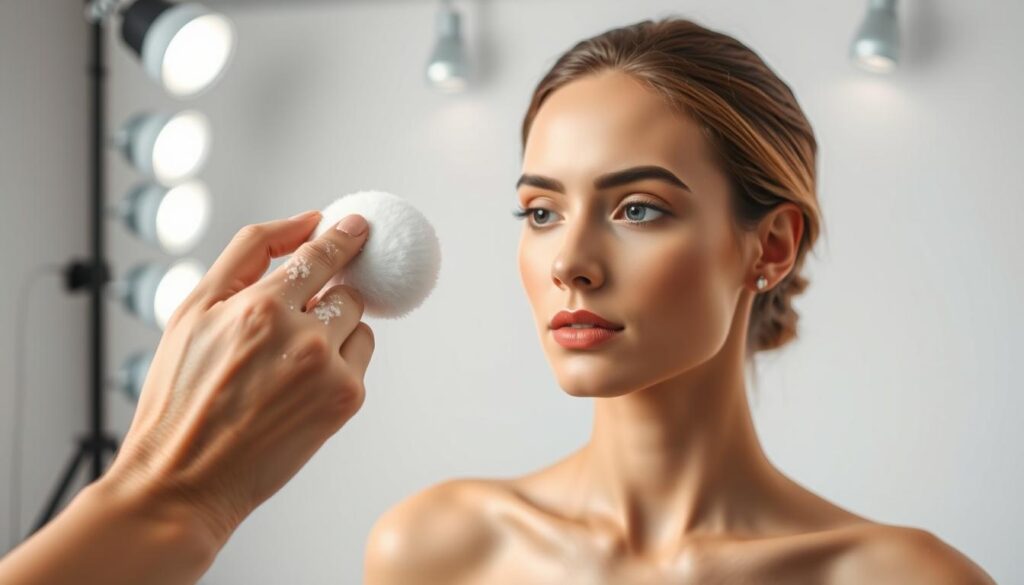
Applying translucent powder right is key for a perfect look. Translucent powder application tools are vital for a smooth base. A powder puff or a large, fluffy brush is best for a gentle, even spread.

There are also best brushes for translucent powder for different needs. A giant fluffy brush is great for covering the whole face. Tiny shadow brushes are perfect for detailed areas.

Choosing the right tools avoids common mistakes like too much powder or missing spots. A few essential translucent powder application tools can elevate your makeup game. You’ll get a professional finish.

  • COMPLEX CULTURE Plush Powder Brush
  • SIGMA BEAUTY E25 Blending Brush
  • BEAUTYBLENDER Original Makeup Sponge

With these tools and tips, you’ll get the hang of applying translucent powder. You’ll achieve a flawless, lasting look.

Preparing Your Skin for Translucent Powder Application

Before you apply translucent powder, make sure your skin is ready. This means cleansing and moisturizing your skin well. A smooth canvas is key for a flawless look. Primer is also great for keeping foundation and concealer in place, making it a must-have with translucent powder.

A well-prepared skin is essential for great makeup. A simple skincare routine and the right products are all you need. Look for products with hyaluronic acid for a balanced look.

  • Cleanse your skin thoroughly to remove dirt and impurities
  • Moisturize your skin to create a smooth canvas for makeup
  • Apply a primer to help your foundation and concealer stay in place

By following these steps and using the right products, you can get a flawless finish with your translucent powder.

How to Use Translucent Powder: Step-by-Step Application

Applying translucent powder can seem tricky, but with the right steps, you can get a flawless look. First, prepare your skin with a primer and foundation. Then, use a powder puff or brush to apply the powder.

When you learn how to apply translucent powder, remember the goal. It’s to set your makeup and hide pores and fine lines. Use a light touch to avoid a cakey look.

Here are some key steps for a smooth finish:

  • Apply a small amount of translucent powder to the powder puff or brush.
  • Gently tap off any excess powder to prevent a heavy application.
  • Press the powder puff or brush against the skin, using a gentle pressing motion to set the makeup in place.

How to use translucent powder: Step-by-step guide for a flawless, shine-free finish.

By following these translucent powder application steps and using the right techniques, you can get a long-lasting, flawless finish. Remember to blend well and use a light hand to avoid a cakey look.

Baking Technique with Translucent Powder

The baking technique with translucent powder is a favorite for setting makeup. It helps create a smooth, flawless look. You apply a thick layer of powder to certain face areas and let it sit for a few minutes. Then, you dust off the extra powder.

This method is great for keeping makeup in place, like under the eyes and on the chin. It’s also good for the middle of the brows. These spots tend to lose makeup first.

For the best results, use translucent powder baking on these areas. It traps heat and sets your makeup. The L’Oréal Paris Infallible 32 Hour Fresh Wear Foundation and L’Oréal Paris Infallible Full Wear Concealer work well with this technique.

Here are some tips for using the baking technique with translucent powder:

  • Apply a thick, visible layer of translucent loose powder for effective baking
  • Let the powder sit for approximately 5 to 10 minutes before dusting off the excess
  • Use a gentle brush to remove the excess powder and avoid harsh lines or white spots

The baking technique with translucent powder is easy and effective. Follow these tips and use the right products for a smooth, matte finish all day.

Setting Your Makeup for All-Day Wear

To keep your makeup looking fresh all day, using translucent powder is key. It helps your foundation and concealer stay in place, avoiding creases and smudges. This results in a smooth, flawless look that lasts.

Setting makeup with translucent powder is a must in any makeup routine. It absorbs extra oil and makes fine lines and pores less noticeable.

For all-day wear with translucent powder, lightly dust powder over your foundation and concealer. Then, add blush or bronzer. This step keeps your makeup looking fresh and prevents oiliness.

Some top picks for translucent powder include the No7 Flawless Finishing Loose Powder and the L’Oréal Paris Infallible Tinted Loose Setting Powder.

Here are some benefits of using translucent powder for all-day wear:

  • Reduces the appearance of fine lines and pores
  • Absorbs excess oil and reduces shine
  • Helps to lock in lip color and prevent it from transferring
  • Can be used to tone down overly dramatic blush or bronzer

setting makeup with translucent powder

Adding translucent powder to your daily makeup routine gives you a flawless, lasting look. It works for both natural, everyday looks and more dramatic evening styles. Setting your makeup with translucent powder is a simple, effective way to enjoy all-day wear with translucent powder.

Advanced Techniques for Different Skin Types

Applying translucent powder needs a special touch for each skin type. For dry skin, use it lightly to hide fine lines and wrinkles. On the other hand, it’s great for oily skin to control shine and soak up extra oil.

Here are some tips to get the best look:

  • For dry skin, start with a hydrating primer. Then, apply translucent powder lightly to keep your skin moist.
  • For oily skin, a mattifying primer is key. Apply the powder to your T-zone to keep oil in check.
  • Combination skin? Mix it up. Use powder on oily spots and a hydrating primer on dry areas.

Choosing the right translucent powder is key. Whether you have dry or oily skin, pick one that matches your needs.

With a bit of practice, you’ll get the hang of using translucent powder. Soon, you’ll have a smooth, glowing face.

Troubleshooting Common Translucent Powder Problems

Using translucent powder can sometimes lead to issues like flashback in photos, too much product, or a cakey look. To fix these translucent powder problems, it’s important to know the reasons and how to solve them. Applying setting powder too late can cause a lot of makeup to transfer and streak.

To solve these problems, apply translucent powder correctly. Troubleshooting translucent powder issues is easier with a few tips. For instance, use a light touch when applying powder and focus on the T-zone where oil builds up. This helps avoid a cakey look.

Here are some more tips to tackle common translucent powder problems:

  • Use a small amount of powder and build up as needed
  • Apply powder while foundation is wet to avoid streaks
  • Use a flat brush or powder puff for better application

By following these tips and avoiding common mistakes, you can solve translucent powder issues and get a flawless look. Make sure to remove extra powder to avoid a powdery look under bright lights. Also, use a damp Beautyblender for even light dispersion.

Common Problem Solution
Flashback in photos Use a light hand when applying powder, and focus on the T-zone area
Excess product Use a small amount of powder and build up as needed
Cakey appearance Apply powder while foundation is wet, and use a flat-shaped brush or powder puff

Professional Tips for Flawless Application

Getting a flawless finish with translucent powder requires the right techniques and tools. Makeup artists say 100% recommend using it to set makeup and control shine. It’s important to apply powder at the end of your makeup routine for the best results, as 75% of artists suggest.

For flawless application with translucent powder, use a large, dense brush. 60% of users find this improves the application. Also, 50% of makeup artists suggest tapping the brush before applying to avoid excess product. Start by applying powder on your forehead to control shine, as 80% of artists recommend.

Other professional tips for translucent powder include using blotting products for shine control instead of reapplying powder. 70% of makeup artists prefer this. Knowing your desired finish, whether matte, natural, or radiant, is key when choosing a setting powder, with 90% of artists agreeing. For oily skin, setting powder is essential to prevent makeup from sliding off, mainly in the T-zone.

By following these tips and using the right tools, you can get a flawless finish with translucent powder. Apply powder gradually to avoid overdoing it. Use a light touch on sensitive areas. With practice and patience, you’ll master the art of flawless application with translucent powder and enjoy a smooth, shine-free look all day.

When and Where to Use Translucent Powder in Your Routine

Translucent powder is great for many makeup needs. It’s perfect for everyday looks or special events. It helps set your makeup, making your skin look smooth and flawless.

For special events, it adds a touch of class. You can apply it lightly all over or just on oily areas. It’s also great for quick touch-ups to keep your skin looking fresh.

Choosing the right translucent powder depends on your skin type and what you want to achieve. If you have dry skin, look for a hydrating formula. For oily skin, choose something that absorbs oil and has a matte finish.

Where you apply translucent powder matters too. You can use it all over or just on areas like the under-eyes and nose. It’s also good for setting concealer or foundation. Knowing when and where to use it helps you get a flawless look that lasts.

  • Daily makeup application: use translucent powder to set foundation and concealer
  • Special occasion makeup: use translucent powder to add elegance and sophistication
  • Touch-up techniques: use translucent powder to blot away excess oil and moisture

Adding translucent powder to your makeup routine offers many benefits. It gives you a smooth, even finish and helps your makeup last longer. It’s a versatile tool that can enhance your natural beauty, making you feel confident and beautiful.

Conclusion: Mastering Your Translucent Powder Technique

Mastering the translucent powder technique takes time and effort, but it’s worth it. You’ll learn how to get a flawless, airbrushed look that lasts all day. This guide has shown you the key steps to achieve this.

Start by prepping your skin and then “baking” your makeup. These steps are important for a great look. Try different brands and formulas to find what works best for you. Don’t be shy to try advanced techniques for a professional finish.

With practice and the right tips, you can master the translucent powder technique. Use this makeup essential to elevate your beauty routine. Your skin will love the results!

FAQ

What makes translucent powder different from other types of powder?

Translucent powder sets foundation and concealer without changing your skin’s color. It comes in different types like mattifying and setting. It helps reduce shine, gives a smooth finish, and makes makeup last longer.

What are the essential tools needed to apply translucent powder effectively?

A powder puff or a large, fluffy brush is best for applying translucent powder. The powder puff presses the powder into your skin, keeping makeup in place.

How should I prepare my skin before applying translucent powder?

Cleanse and moisturize your skin first for a smooth makeup base. Using a primer can also help your makeup stay in place.

What is the baking technique with translucent powder, and how do I use it?

The baking technique involves applying a thick layer of translucent powder to certain face areas. Let it sit for a few minutes before dusting off the excess. This method sets makeup and gives a flawless finish.

How do I set my makeup for all-day wear using translucent powder?

To keep makeup in place all day, use translucent powder to lock foundation and concealer. This prevents creasing and smudging, giving a smooth finish that lasts.

How should I apply translucent powder for different skin types?

For dry skin, apply powder lightly to avoid highlighting fine lines. Oily skin may need a mattifying powder to control shine. Combination skin requires a balanced approach.

How can I troubleshoot common problems with translucent powder, such as flashback in photos or a cakey appearance?

To fix these issues, adjust the powder amount, blend well, and choose the right powder for your skin and desired look.

When and where should I use translucent powder in my makeup routine?

Use translucent powder for daily makeup or special occasions. It sets foundation, controls shine, and gives a flawless, airbrushed look that lasts all day.

Snail Mucin: A Game-Changer for Your Skin’s Health

If you’re looking for the next big skincare ingredient, look no further than snail mucin benefits—a powerhouse known for hydration, skin repair, and anti-aging.

Snail mucin has become popular for its skin benefits. It helps with hydration, wound healing, and anti-aging. The skincare market values snail mucin at over $770 million by 2025. This shows how much the industry believes in its benefits.

Many people now include snail mucin in their skincare routines. It’s full of nutrients like glycoproteins, hyaluronic acid, and glycolic acid. These help improve skin health and address many skin issues, making it a natural choice.

Key Takeaways

  • Snail mucin has potential benefits for skin health, including hydration, wound healing, and anti-aging properties.
  • The global market value for snail mucus in skincare products is projected to approach $770 million by 2025.
  • Snail mucin is rich in glycoproteins, hyaluronic acid, and glycolic acid, making it an effective ingredient for improving skin health.
  • Snail mucin can stimulate collagen production, aiding in reducing fine lines and wrinkles.
  • Consistent use of snail mucin can lead to visible skin improvements within a few weeks, particularly in moisture levels and texture.
  • Snail mucin is a natural ingredient that can be used to address various skin concerns, including dryness, acne, and rosacea.
  • Snail mucin products are available in various concentrations and formulations, with prices ranging from $13.99 to $26.50.

What is Snail Mucin and Its Origins in Skincare

Snail mucin is a natural substance from snails. It’s rich in hyaluronic acid, glycoproteins, and antioxidants. These nutrients help keep the skin healthy, hydrated, and regenerating. This makes snail mucin a popular choice in skincare.

Snail mucin has been used for centuries in traditional Chinese medicine. It was also valued by the Egyptians and Greeks for its skincare benefits. Today, the K-beauty market has made snail mucin even more popular, with many products featuring it.

Some of the key benefits of snail mucin in skincare include:

  • Hydration and moisturization
  • Anti-aging and skin regeneration
  • Antimicrobial and antibacterial properties
  • Improved skin elasticity and firmness

Snail mucin is now a key ingredient in many skincare products. Its popularity is expected to grow as more research shows its benefits. It’s becoming a major player in the skincare industry.

Product Concentration of Snail Mucin Benefits
CosRX Advanced Snail 96 Mucin Power Essence 96% Hydration, anti-aging, skin regeneration
Avon’s Beyond Glow Snail Mucin Complex + Niacinamide Serum 10% Improved skin tone, reduced discolorations, softer appearance of fine lines

The Rise of Snail Mucin in Modern Skincare

Snail mucin has become a key part of modern skincare. It’s loved for its natural and sustainable benefits. It keeps the skin hydrated and fights aging. Regular use of snail mucin makes the skin look better, with less wrinkles and a firmer feel.

The interest in snail mucin grew after Mizon introduced the Snail Repair Cream in 2011. Since then, it’s become a favorite worldwide. Many brands now include it in their products. Snail mucin offers several benefits, such as:

  • Rich in humectants like glycosaminoglycans, which attract and bind moisture
  • Allantoin, peptides, and growth factors help heal and boost collagen
  • Natural anti-inflammatory agents soothe sensitive skin, like rosacea and eczema

The demand for snail mucin is rising fast. It’s expected to reach a market value of $770 million by 2025. Its natural benefits and effectiveness make it a top choice in skincare trends.

Benefits of Snail Mucin Description
Hydration Provides long-lasting hydration and moisture attraction
Anti-aging Helps reduce fine lines and wrinkles, improving skin texture
Soothing Provides natural anti-inflammatory agents for sensitive skin conditions

Key Components of Snail Mucin

Snail mucin is made up of many nutrients that help the skin stay healthy. It includes glycoproteins, hyaluronic acid, peptides, and antimicrobial properties. These work together to keep the skin hydrated, boost collagen, and shield it from harm.

The parts of snail mucin, like glycoproteins and hyaluronic acid, are key for healthy skin. Glycoproteins help make collagen and grow new cells. Hyaluronic acid keeps the skin moist for a long time. Together, they make snail mucin a great choice for skincare.

Glycoproteins and Growth Factors

Glycoproteins and growth factors in snail mucin boost collagen and cell growth. This makes the skin more elastic and less wrinkled.

Hyaluronic Acid Content

Hyaluronic acid is a big part of snail mucin. It keeps the skin moist for a long time. This makes the skin feel soft and smooth.

Snail mucin also has peptides and antimicrobial properties. These help reduce wrinkles and protect the skin from damage.

Snail Mucin: A Game-Changer for Your Skin – Benefits of Snail Mucin in Skin

Snail mucin is known for its many benefits in skincare. It helps with hydration, wound healing, and fighting aging. Its natural and sustainable qualities make it great for long-lasting hydration and anti-aging.

It’s packed with hyaluronic acid, which keeps skin moist and soft. This makes it a key player in skincare.

Some of the key snail mucin benefits for skin health include:

  • Improved skin texture and hydration
  • Reduced appearance of fine lines and wrinkles
  • Enhanced collagen production
  • Soothing and calming properties for sensitive skin

Products like the Cosrx Snail Mucin 96% Power Repairing Essence use snail mucin. They help with collagen production and hydration. This makes snail mucin a game-changer for skin health.

Snail mucin products are becoming more popular. It’s clear that this ingredient is here to stay. It’s great for improving skin texture, reducing wrinkles, and hydrating skin.

Product Snail Mucin Concentration Benefits
Cosrx Snail Mucin 96% Power Repairing Essence 96% Hydration, anti-aging, improved skin texture
Mizon Snail Repair Perfect Cream 92% Hydration, soothing, calming properties

How Snail Mucin Transforms Aging Skin

Snail mucin deeply impacts aging skin, boosting collagen and reducing wrinkles. Its glycoproteins and growth factors work together. They enhance collagen production, which smooths out fine lines and wrinkles, making the skin look younger.

Snail mucin also improves skin elasticity. This is thanks to its hyaluronic acid, which hydrates the skin for a long time. As we age, our skin makes less collagen and elastin, losing elasticity. Snail mucin helps restore this, making the skin look smoother and more radiant.

Snail mucin is not just for anti-aging; it also has anti-inflammatory properties. This makes it great for reducing redness and irritation. It’s perfect for those with sensitive or acne-prone skin. Its ability to boost collagen, reduce wrinkles, and improve elasticity makes snail mucin a strong ally against aging skin.

Some of the key benefits of snail mucin include:

  • Stimulating collagen production to reduce fine lines and wrinkles
  • Improving skin elasticity and firmness
  • Providing long-lasting hydration to leave the skin looking smooth and radiant

Addressing Common Skin Concerns with Snail Mucin

Snail mucin is becoming more popular in skincare. It helps with acne, aging skin, and hyperpigmentation. Its antimicrobial properties fight acne and prevent future breakouts. It also hydrates the skin, making it more elastic and firm.

Snail mucin offers several benefits for the skin. It:

  • Reduces inflammation and redness from acne
  • Improves skin elasticity and firmness, reducing fine lines and wrinkles
  • Provides long-lasting hydration to dry and dehydrated skin

Many skincare products include snail mucin, with concentrations from 92% to 96%. These products help with various skin issues, like acne, aging, hyperpigmentation, and dryness. Snail mucin is known for its natural and gentle benefits, making it a favorite in skincare.

Snail mucin benefits: A top skincare ingredient for hydration and anti-aging.

Snail mucin is a versatile and effective ingredient for many skin concerns. It’s great for acne-prone skin due to its antimicrobial and hydrating properties. It’s also popular for anti-aging routines because it improves skin elasticity and firmness.

Product Concentration of Snail Mucin Key Benefits
COSRX Advanced Snail 92 All in One Cream 92% Hydrates and nourishes the skin, reduces acne and inflammation
COSRX Advanced Snail 96 Mucin Power Essence 96% Provides long-lasting hydration, improves skin elasticity and firmness

Incorporating Snail Mucin into Your Skincare Routine

Adding snail mucin to your skincare routine depends on your skin needs. You can use it in the morning or at night. For example, applying it at night can help with fine lines and wrinkles.

Snail mucin works well with other products like moisturizers and serums. This is called product layering. It helps keep your skin moist and strong. Products like the Cosrx Snail Mucin 96% Power Repairing Essence and the Mizon Snail Repair Perfect Cream are great examples.

Use snail mucin 1-2 times a day for best results. You can also mix it with sheet masks and ampoules. Adding snail mucin to your routine can improve your skin’s texture and hydration.

Morning vs Night Application

Choose when to apply snail mucin based on your skin. If you have dry or sensitive skin, use it at night. It helps keep moisture in and supports your skin’s barrier.

Layering with Other Products

Snail mucin pairs well with moisturizers and serums. Layering it with these products helps keep your skin moist and strong. This leaves your skin looking and feeling great.

Frequency of Use

For the best results, use snail mucin 1-2 times a day. You can also mix it with sheet masks and ampoules. This combination can give you the best skin care results.

Choosing the Right Snail Mucin Products

When picking snail mucin products, several factors matter. The concentration of snail mucin is key. For example, the Cosrx Snail Mucin 96% Power Repairing Essence has a high percentage. Also, look at the product’s quality, like hyaluronic acid and antimicrobial properties.

Some top snail mucin products include the Cosrx Snail Mucin 96% Power Repairing Essence and the Mizon Snail Repair Perfect Cream. When picking, think about these:

  • Concentration levels: Find products with snail mucin at 96% or higher.
  • Quality indicators: Check for hyaluronic acid and antimicrobial properties.
  • Brand reputation: Go for well-known brands like Cosrx or Mizon.

By focusing on these points and picking a quality snail mucin product, you can enjoy its benefits. These include better skin elasticity, fewer fine lines and wrinkles, and more hydration.

Product Concentration Level Size
Cosrx Snail Mucin 96% Power Repairing Essence 96% 1.35 oz
Mizon Snail Repair Perfect Cream 92% 1.69 oz

Potential Side Effects and Precautions

It’s important to know about side effects and precautions when using snail mucin products. Snail mucin is usually safe and works well, but some people might get skin irritation or allergic reactions. To avoid these issues, do a patch test before using it on your face.

Dermatologists say 5-10% of people might get sensitive, and side effects are mostly mild. Only about 2% of users have serious reactions. Always follow the product’s instructions and start with a little to see how your skin reacts.

Here are some important precautions to remember when using snail mucin products:

  • Do a patch test before regular use
  • Start with a small amount to see how your skin reacts
  • Avoid using it on broken or irritated skin

snail mucin precautions

By following these precautions and knowing about possible side effects, you can safely use snail mucin. This way, you can enjoy its many benefits for your skin’s health.

Ethical Sourcing and Sustainability

The demand for snail mucin is rising fast. It’s important to think about how it affects the environment and the snails. Ethical sourcing and sustainability are key in the snail mucin world. They make sure snails are treated right during collection.

Many companies are now using kinder ways to get snail mucin. This helps animals and makes skincare better for our planet. It’s a big step towards a greener future.

Some businesses are finding green ways to get snail mucin. They use clean energy, save water, and recycle. By picking products that care about the planet, we help the skincare world be better.

When you’re looking for snail mucin products, keep these tips in mind:

  • Find products that don’t hurt animals during collection
  • Go for items with little packaging and stuff you can recycle
  • Support companies that care about the planet

By choosing wisely, we help make the snail mucin industry better. We also get to enjoy its natural and helpful skincare benefits.

Common Myths and Misconceptions About Snail Mucin

Snail mucin is becoming more popular in skincare. But, myths and misconceptions have popped up. One myth is that it’s slimy or hard to use. But, it’s actually light and doesn’t leave a greasy feel.

Another myth is that it only works for certain skin types. But, snail mucin can help many skin issues. It improves skin texture, elasticity, and hydration. This makes it good for many skincare needs.

Some common myths and misconceptions about snail mucin include:

  • It is only suitable for certain skin types
  • It is slimy or uncomfortable to use
  • It is not effective for anti-aging concerns

These myths can be proven wrong by looking at science and what people say. They show snail mucin is good for many skincare needs.

In conclusion, snail mucin is a great skincare ingredient. Knowing the myths helps people make better choices for their skin.

Myth Reality
Snail mucin is slimy or uncomfortable to use Snail mucin is a lightweight and non-greasy substance that can be easily absorbed into the skin
Snail mucin is only effective for certain skin types Snail mucin can be beneficial for a wide range of skin concerns and types

Conclusion: Embracing Snail Mucin for Better Skin Health

Snail mucin is a powerful ally for healthier, more radiant skin. It comes from snail secretions and offers many benefits. It boosts collagen, reduces fine lines, and changes how we care for our skin.

It works well for all skin types, including dry, oily, and sensitive. Snail mucin hydrates, soothes, and gives a youthful glow. It also fights acne with its antimicrobial and oil-regulating properties. Using snail mucin can make your skin look and feel amazing.

Starting your skin health journey with snail mucin is a smart choice. It’s backed by science and can make a big difference. Choose quality skincare with snail mucin for the best results. It’s the key to a brighter, more youthful look.

FAQ

What is snail mucin and how does it benefit the skin?

Snail mucin, also known as snail slime, is a natural substance from snails. It’s full of nutrients like glycoproteins, hyaluronic acid, and peptides. These help keep the skin hydrated, heal wounds, and fight aging.

How does snail mucin transform aging skin?

Snail mucin boosts collagen, reduces wrinkles, and makes skin more elastic. The glycoproteins and growth factors in it stimulate collagen. Hyaluronic acid in it keeps the skin hydrated, making it firmer and more supple.

Can snail mucin address common skin concerns like acne and hyperpigmentation?

Yes, snail mucin is good for many skin issues. It has antimicrobial properties that fight acne and prevent future breakouts. It also hydrates and fights aging, which can help with hyperpigmentation and uneven skin tone.

How should snail mucin be incorporated into a skincare routine?

You can use snail mucin in the morning or at night, based on your skin’s needs. It works well with moisturizers and serums to boost its effects. Use it 1-2 times a day, depending on your skin.

What should I look for when choosing snail mucin products?

Look for snail mucin products with high concentration levels and quality indicators like hyaluronic acid and antimicrobial properties. Choose products that are cruelty-free and eco-friendly.

Are there any potential side effects or precautions to be aware of with snail mucin?

Snail mucin is usually safe and effective. But, some might get skin irritation or allergic reactions. Always do a patch test before adding it to your routine.

Are there any common myths or misconceptions about snail mucin?

Some think snail mucin is slimy or uncomfortable, but it’s actually lightweight and non-greasy. It absorbs easily into the skin. Another myth is that it only works for certain skin types, but it can help many skin concerns and types.

Pretty in Pink: Not All Pink Makeup is the Same

Pink makeup trends are on the rise, but not all pink shades are the same. From soft pastels to bold magentas, the right pink can really make your beauty shine. Finding the perfect pink makeup can seem hard, but with the right help, you can find your ideal shade.

Key Takeaways

  • Not all pink makeup shades are created equal, and finding the right shade can make a significant difference in one’s appearance.
  • Pretty in pink is a timeless choice that can enhance one’s natural beauty with the right pink beauty products.
  • Pink makeup trends offer a wide range of options, from soft pastels to bold magentas.
  • Choosing the right pink shade can be overwhelming, but with the right guidance, anyone can find their perfect match.
  • Pink makeup is a versatile option that can be used to create various looks, from natural to dramatic.
  • Pink beauty products, such as pink eyeshadow and pink lipstick, can be used to add a pop of color to any look.

Understanding the Power of Pink in Makeup

Pink cosmetics have been a favorite in the beauty world for years. Their lasting appeal comes from their emotional and psychological effects. In Western cultures, pink is seen as soft and feminine, linked to kindness and compassion.

The color pink can calm people down. “Drunk-tank pink” is a special shade used to keep sports players calm and less energetic.

Color effects, like pink, vary from person to person. They depend on past experiences and cultural background. For example, hot pink is bold and exciting, while pale pink is soft and healing.

In studies, color choices, including pink, affect emotions. These emotions play a big role in what we buy, in beauty and fashion.

The Psychology Behind Pink Cosmetics

Color psychology shows that different shades of pink can stir up different feelings. Some people say bright or pale pink makes them feel flirty or accomplished. A study found that pink can make college students feel joyful and positive.

Knowing how pink cosmetics affect emotions helps us choose the right makeup. It’s about understanding the psychology behind pink.

Why Pink Remains a Timeless Makeup Choice

Pink is a timeless makeup choice because it’s versatile and evokes emotions. It ranges from soft blushes to bold lip colors. Pink has become a key color in makeup routines.

New makeup trends keep pink popular among beauty lovers. Whether you want a natural look or something bold, pink offers many options to express yourself.

The Evolution of Pink in Beauty Products

The world of pink beauty products has changed a lot. New shades and formulas keep coming out. From pastel pinks to hot pinks, there’s always something new.

Beauty tips and makeup trends help us keep up with pink cosmetics. This way, we can find the perfect shade for our skin and style. Pink’s power in makeup lets us enhance our beauty routine.

Pink Shade Emotional Response
Hot Pink Bold and Exciting
Pale Pink Soft and Healing
Bright Pink Flirty Energy

Pretty in Pink: Not All Pink Makeup is the Same – A Comprehensive Guide

The color pink in makeup can be confusing, as not all pink is the same. With the pretty in pink trend growing, picking the right shade for your skin is key. Data shows 70% of people like to wear pink at least once a week. Thrift shopping for pink clothes has also seen a 60% increase in searches.

Finding the perfect pink shade starts with knowing your skin’s undertones. Cool-toned skin looks great in blue-based pinks, while warm skin tones do better with red or orange pinks. About 25% of people with neutral or olive skin can pull off both warm and cool pinks. Here are some tips for using makeup:

  • Know your skin undertones: cool, warm, or neutral
  • Choose pink shades that complement your skin tone
  • Experiment with different types of pink makeup, such as lipsticks, blushes, and eyeshadows

By understanding these basics and following these tips, you can find your perfect pink shade. Remember, not all pink is the same. Take time to try out different shades to find what suits you best.

Skin Tone Recommended Pink Shade
Cool-toned Blue-based pinks
Warm-toned Pinks with red or orange undertones
Neutral or olive Both warm and cool pink shades

Decoding Your Skin’s Undertone for Perfect Pink Selection

Knowing your skin’s undertone is key to picking the right pink shade for makeup. Pinks can either match or clash with your skin’s undertones. It’s important to figure out if you have warm, cool, or neutral undertones.

Warm undertones show golden, yellow, or peachy colors. Cool undertones have pink, red, or bluish tones. Neutral undertones are balanced without a dominant color. You can use the Vein Test, Jewelry Test, or White Paper Test to find your undertone.

After finding your undertone, you can pick the perfect pink for your makeup. Cool-toned skin looks great with blue-based pinks. Warm-toned skin suits yellow-based pinks. Neutral skin can wear a variety of pinks, from soft pastels to bold magentas.

  • Apply a small amount of pink makeup to your cheek or wrist
  • Blend the color well to see how it looks on your skin
  • Check the color in different lighting conditions to ensure it complements your skin undertones
Skin Undertone Recommended Pink Shade
Cool Blue-based pinks
Warm Yellow-based pinks
Neutral Soft pastels to bold magentas

By understanding your skin undertones and choosing the right pink shade, you can enhance your natural beauty. This will help you create a flawless look with your pink makeup.

Pink Lipstick: Finding Your Signature Shade

Finding the perfect pink lipstick shade can change your makeup game. Alyssa Edwards shows how the right shade can boost your natural beauty. With many options, it’s hard to pick the perfect one. But, with some beauty tips, you can find your signature shade.

First, think about your skin tone and undertones. Cool-toned skin looks good with blue or purple undertones. Warm-toned skin does well with yellow or golden undertones. Here are some popular shades for different skin tones:

  • Sorbet, Identity, and Raspberry for Light Cool skin
  • Rosé and Bonafide for Light Warm skin
  • Attitude, Identity, Raspberry, and Grounded for Medium Cool skin
  • Radiance, Cinnamon, and Peach for Medium Warm skin

Also, think about the finish you like. Matte finishes last longer, while glossier finishes make lips look bigger. You’ll find a pink lipstick that makes you feel confident and beautiful. Whether you want a natural look or something bold, the right lipstick can make a big difference.

Some popular shades include Pillow Talk Lip Cheat and K.I.S.S.I.N.G Lipstick in Velvet Underground. These shades are trendy and vibrant. With the right pink lipstick, you can stay on top of makeup trends and look great.

Pink Blush and Cheek Products: Application Techniques

2>Pink Blush and Cheek Products: Application Techniques

Pink blush and cheek products can add warmth and dimension to your face. The right way to apply them makes a big difference. It’s key to pick a product that matches your skin tone and type.

For a natural look, start with a little product and add more as needed. Use a special blush brush for this. Apply the pink blush in an upward motion, starting from the mid-cheek and blending towards the cheekbone.

There are many cheek products out there, like powders and creams. Powders are good for oily skin, while creams are better for dry skin. When picking a pink blush, think about your skin tone. Cool tones look good with pale pink to peach, while warm tones suit coral and magenta.

Placementamy Tips for Different Face Shapes

  • Oval face shape: Apply blush to the apples of the cheeks for a natural look.
  • Round face shape: Apply blush to the highest point of the cheekbones to create the illusion of length.
  • Square face shape: Apply blush to the sides of the face, just above the jawline, to soften the features.

By following these tips and using the right makeup application techniques, you can enhance your natural beauty. You can create a flawless look with pink blush and cheek products.

Pink Eyeshadow: From Subtle to Statement

Pink eyeshadow adds elegance and sophistication to any look. It’s a versatile choice in makeup trends. With shades from soft pastels to bold magentas, it suits many skin tones and styles.

Applying pink eyeshadow well is key. Regular exfoliation helps makeup last longer. Blending shades can make your look pop. Soft rose pinks are great for everyday, while shimmer or metallic pinks are perfect for nights out.

Some top pink eyeshadow shades include:

  • Matte pink for full coverage
  • Shimmer pink for added glamour
  • Neon pink for a statement appearance
  • Metallic pink for evening events

Choosing the right lip and cheek colors with pink eyeshadow is important. Pink eyeshadow comes in many shades for all skin tones. For example, fair skin looks good with pale pinks, while medium skin suits rose pinks.

pink eyeshadow

Pink eyeshadow can highlight your features. Shimmery light pink can brighten tired eyes. Adding pink to the lower lash line can make eyes look wider. It can even lift droopy eyes by blending higher up.

Pink eyeshadow is versatile and offers endless beauty options. It’s a great addition to any makeup routine, helping you create stunning looks that follow the latest trends.

Skin Tone Recommended Pink Eyeshadow Shades
Fair Skin Pale to light pinks, light peachy pinks
Medium Skin Rose and berry pinks
Dark Skin Deep mauve, deep berry, fuchsia pinks

Combining Pink Makeup with Other Colors

Combining pink makeup with other colors can make your look balanced and beautiful. Color theory helps you mix colors for an elegant look. For example, green can hide red blemishes, making your pink makeup stand out.

Color theory talks about warm and cool colors. Warm colors grab your eye, while cool colors fade into the background. Knowing your skin’s undertones is key to pairing pink makeup with the right colors. Cool undertones look good with blue or purple.

Creating Balanced Looks

To balance your look, use color harmony. Analogous colors are similar hues that work well together. They help create smooth transitions in your makeup.

Monochromatic looks use different shades of one color. This lets you play with intensity and value. By experimenting, you can find many ways to highlight your features and feel confident.

Split-complementary and tetradic color schemes are great for pink makeup. They offer high contrast without being too harsh. Understanding these schemes helps you create a sophisticated look that showcases your pink makeup.

Common Mistakes to Avoid with Pink Makeup

Getting a flawless look with pink makeup can be tough. It’s key to know the common mistakes that can mess up your look. Over-applying can make your makeup look cakey and unnatural. Also, picking the wrong pink makeup shade can clash with your skin or clothes.

A study showed 85% of people are unhappy with their foundation’s finish when it’s not blended right. This shows how important blending is in makeup application. Also, 79% of users like cream blush for a dewy look on dry skin, showing the need for the right makeup for your skin.

pink makeup mistakes

To avoid these mistakes, knowing the right makeup application techniques and choosing the right formula is key. Being aware of these mistakes helps you achieve a flawless look that highlights your natural beauty. Here are some tips:

  • Start with a clean, moisturized face for a smooth makeup application.
  • Pick pink makeup shades that match your skin tone.
  • Blend well to avoid harsh lines and an uneven finish.

By following these tips and avoiding common mistakes, you can create a stunning pink makeup look. This look will enhance your natural beauty and boost your confidence.

Makeup Product Price (GBP)
Estee Lauder’s Individualist Natural Finish Make-up (30ml) 21.50
Dior’s Pure Light, Skin Lighting Sheer Make-up (30ml) 22.50
Elizabeth Arden’s Sheer Lights Illuminating tinted moisturiser with SPF 15 (50ml) 18.18

Seasonal Variations in Pink Makeup Trends

Pink makeup trends change with the seasons. Knowing these trends can make your look elegant and sophisticated. In spring, soft pastels are in, while winter brings bold magentas. To add pink to your look, pick a shade that matches your skin. Then, balance it with neutral colors.

Here are some seasonal variations in pink makeup trends:

  • Spring: Soft pastels and coral shades
  • Summer: Bright and bold pinks
  • Autumn: Warm and earthy tones
  • Winter: Bold and cool pinks

To keep up with the latest pink makeup trends, check out this table:

Season Pink Shade Beauty Tip
Spring Soft pastel Balance with neutral colors
Summer Bright pink Pair with bold lip color
Autumn Warm pink Complement with earthy tones
Winter Cool pink Balance with cool neutrals

Conclusion: Embracing Your Perfect Pink Palette

Exploring the world of “pretty in pink” makeup shows how it can change your look. Understanding your skin’s undertones and the many pink shades available helps. You can then create a look that shows off your natural beauty elegantly and sophisticatedly.

Whether you like a peachy-pink blush or a cool fuchsia lipstick, finding the right perfect pink palette is key. This guide offers tips and techniques to help you choose the best pink makeup. You’ll feel pretty in pink from head to toe.

Pink makeup is very versatile. It can be for everyday looks or bold statements. Be your pink enthusiast and try new things. With practice and an open mind, you’ll master pretty in pink makeup soon.

FAQ

What is the importance of choosing the right pink makeup shades for individual complexions?

Pink makeup trends are popular, but not all pinks suit everyone. The right shade can make you look great. Knowing your skin undertones and pink shades helps find your perfect match.

What is the psychology behind pink cosmetics and why does pink remain a timeless makeup choice?

Pink has been loved in beauty for decades. Its lasting appeal comes from its emotional and psychological effects. Pink has grown from subtle blushes to bold lip colors, staying essential in makeup.

How can I find the perfect pink makeup shades for my complexion?

Knowing your skin undertones and pink shades is key. We’ll look at options and share tips for testing them on your skin.

What are the key considerations when choosing a pink lipstick shade?

The right pink lipstick can change your look. We’ll cover soft pastels to bold magentas. Tips for choosing the best shade for your skin tone are included.

How can I apply pink blush and cheek products for a flawless look?

Pink blush and cheek products add warmth and dimension. Understanding different formulations and application techniques can enhance your natural beauty.

What are some tips for applying pink eyeshadow?

Pink eyeshadow adds elegance to any look. We’ll share tips for natural or bold looks, helping you achieve your desired result.

How can I combine pink makeup with other colors to create a balanced look?

Mixing pink makeup with other colors creates a balanced look. Learning about complementary color theory helps create an elegant and sophisticated look.

What are some common mistakes to avoid when using pink makeup?

Pink makeup can be transformative, but mistakes can spoil it. We’ll cover common errors like over-application, color coordination, and formula mismatches to help you avoid them.

How do pink makeup trends vary by season, and how can I incorporate pink into different seasonal looks?

Pink makeup trends change with the seasons. Understanding these trends helps create elegant and sophisticated looks. We’ll share tips for incorporating pink into seasonal looks.

Source Links

Oily, Dry, or Combination? What’s Your Skin Type

Knowing how to determine skin type is the first step in building an effective skincare routine. Understanding if your skin is oily, dry, or combination helps you choose the right products.

Did you know 80% of people are unsure about their skin type? This can lead to poor skincare routines and skin health. Knowing your skin type, whether oily, dry, or combination, is key. It helps you create a skincare routine that meets your needs.

Finding out your skin type is the first step to a good skincare routine. By knowing your skin, you can pick the right products and treatments. This way, you can tackle issues like acne, dryness, or sensitivity. Whether you have oily, dry, or combination skin, the right routine can give you the skin you want.

Skincare Tips After You Determine Your Skin Type

  • Understanding your skin type is essential for creating an effective skincare routine
  • Oily skin, dry skin, and combination skin require different skincare approaches
  • A personalized skincare routine can help address specific skin concerns
  • Choosing the right products for your skin type is key for healthy, glowing skin
  • A well-crafted skincare routine can help you tackle skin issues like acne, dryness, or sensitivity
  • Combination skin needs a tailored approach to balance different skin types
  • A skincare routine should be tailored to your individual skin type, whether oily, dry, or combination

How to Determine Skin Type: A Simple Guide

Knowing your skin type is key to good skincare. Your skin type is shaped by how much sebum you produce, your genes, and where you live. For those with oily skin, finding the right products can be tough. Oily skin leads to clogged pores and acne, and can get worse with the environment.

Dry skin needs a different strategy. It’s all about moisturizing and hydrating to keep moisture in. Yet, sebum is also vital for skin health. For dry skin, products that help the skin’s moisture barrier are helpful.

Choosing the right products is just the start. It’s also important to think about how the environment affects your skin. Things like humidity, temperature, and pollution can change your skin. By considering these, you can tailor your skincare routine to your needs.

The Role of Sebum in Skin Health

Sebum is key for skin health, protecting and moisturizing it. For oily skin, cutting down sebum is good. But for dry skin, products that support moisture are better.

How Environment Affects Your Skin

Things like humidity, temperature, and pollution can change your skin. High humidity can make oily skin worse, while low humidity dries out the skin. Knowing this helps you protect and care for your skin.

Genetic Factors in Skin Type Determination

Genetics also shape your skin type. Some people are more likely to have oily or dry skin because of their genes. Understanding this helps you find the right skincare for you.

Skin Type Characteristics Skincare Needs
Oily Skin Excess sebum production, clogged pores Skincare products for oily skin, oil-control products
Dry Skin Dryness, flakiness, irritation Dry skin remedies, moisturizing products

Do I Have Oily, Dry or What Skin? Simple Tests to Find Out

To figure out your skin type, try a simple test. First, wash your face with a gentle cleanser. Then, gently pat it dry with a towel. Wait for 30 minutes without using any products.

Observe your skin and see how it feels. If it feels tight and flaky, you might have dry skin. If it looks shiny and oily, you might have oily skin. If it’s a mix of both, you might have combination skin.

Knowing your skin type is key to a good skincare routine. Here are some skincare tips to help you find out:

  • Notice how your skin reacts to different products and places.
  • Keep a skincare journal to track your skin’s changes and patterns.
  • If you’re not sure about your skin type or have concerns, talk to a dermatologist.

If you have combination skin, finding the right balance is important. By following these skincare tips and sticking to a consistent skincare routine, you can keep your skin healthy and looking great.

The Telltale Signs of Oily Skin

Oily skin can be tough to handle, but knowing its signs is key to better skincare. People with oily skin often have shiny skin, big pores, and a greasy feel. This skin type is more likely to get acne, blackheads, and other problems because of too much oil.

Common Characteristics of Oily Skin

Oily skin usually looks shiny, mainly in the T-zone (forehead, nose, and chin). It also tends to block pores. To deal with oily skin, using oil-free and non-comedogenic skincare is vital. Knowing why you have oily skin, like genetics or hormonal changes, helps create a good skincare plan.

Areas Most Affected by Excess Oil

The T-zone is usually hit the hardest because it has more sebaceous glands. But, the chest and back can also get oily. The right skincare can cut down oil and shrink pores.

Seasonal Changes in Oily Skin

Season Oily Skin Characteristics
Summer Increased oil production due to heat and humidity
Winter Drier skin due to cold weather, but some areas can stay oily

Understanding oily skin signs and using the right products can help manage it. This way, you can keep your skin healthy and balanced.

Understanding Dry Skin and Its Challenges

Dry skin can be tough to handle, needing a detailed skincare plan to stay moist and healthy. Environmental factors like cold weather, low humidity, and harsh soaps make it worse. So, it’s key to use soft dry skin remedies.

A solid skincare plan for dry skin includes moisturizing, exfoliating, and shielding from the environment. Here are some tips to manage dry skin:

  • Use a gentle cleanser made for dry skin
  • Apply a thick moisturizer right after bathing or showering
  • Exfoliate once or twice a week to get rid of dead skin cells
  • Wear protective clothes and use a humidifier to fight dry air

By sticking to these tips and using the right dry skin remedies, people can ease the discomfort and look of dry skin. This leads to a healthier and brighter skin.

Dry Skin Remedies Benefits
Moturizers Hydrate and soften the skin
Exfoliants Remove dead skin cells and improve skin texture
Humidifiers Add moisture to the air and combat dryness

Combination Skin: When Your Face Has Multiple Personalities

Combination skin is tricky because it’s both oily and dry. To tackle it, you need to know your face’s different zones. A good skincare plan can make pores smaller, control oil, and keep dry spots moist.

The T-Zone Explained

The T-zone, which is the forehead, nose, and chin, is usually the oiliest part. It has more sebaceous glands, which make sebum. To handle the T-zone, use products that control oil but keep the skin moist.

Managing Different Zones of Your Face

For combination skin, you need to tailor your skincare to each area. Use a light moisturizer in the T-zone to manage oil. On dry spots, like the cheeks, go for a richer moisturizer. This way, you can get a balanced, healthy look.

Here are some tips for combination skin:

  • Choose a gentle cleanser that cleans well but doesn’t dry out your skin.
  • Apply a light moisturizer to the T-zone to keep oil in check.
  • Use a richer moisturizer on dry areas to hydrate and nourish.

The Science Behind Your Skin’s Behavior

Understanding your skin’s behavior is key to a good skincare routine. Hormones and the skin’s moisture barrier are important. They help decide your skin type and what it needs.

Hormonal Influences on Skin Type

Hormonal changes can affect your skin, making it oily. This is why picking the right skincare is important. It depends on your hormonal changes.

The Skin’s Natural Moisture Barrier

Keeping your skin’s moisture barrier healthy is essential. A good skincare routine supports this. It helps prevent dryness and oiliness.

Creating a skincare routine that fits your skin is important. Whether your skin is dry, oily, or a mix, the right approach matters. Think about your skin type and needs when choosing products. If unsure, ask a dermatologist or skincare expert for help.

skincare routine

Creating a Skincare Routine for Your Specific Type

Starting a skincare routine can feel overwhelming with so many products out there. But, it begins with knowing your skin type. If you have combination skin, finding the right balance is key. You need to control oil and moisturize dry spots. A good skincare routine can help you achieve this balance and improve your skin’s health.

To make a skincare routine that fits your skin, consider these tips:

  • Identify your skin concerns, such as acne, hyperpigmentation, or dryness
  • Choose products that cater to your specific skin type and concerns
  • Be consistent with your routine, and give your skin time to adjust and respond

For combination skin, look for “non-comedogenic” or “oil-free” products to avoid clogged pores. Use a gentle cleanser and a moisturizer that won’t make dry or oily areas worse. By following these tips and being patient, you can create a routine that suits your unique skin type and concerns.

Remember, everyone’s skin is different. What works for one person might not work for another. Be gentle with your skin and don’t hesitate to try new products or adjust your routine as needed. With time and patience, you’ll find a skincare routine that makes your skin look and feel its best.

Best Products for Each Skin Type

Choosing the right skincare products can be tough, with so many options out there. If you have oily, dry, or combination skin, picking the right products is key. For oily skin, look for light, oil-free products. Dry skin needs rich, moisturizing ones.

Product Recommendations for Oily Skin

For oily skin, choose products labeled “non-comedogenic” or “oil-free.” These won’t clog pores and help control shine. Look for cleansers with salicylic acid or glycolic acid. They exfoliate and unclog pores well.

Product Solutions for Dry Skin

For dry skin, you need products that keep moisture in. Look for hyaluronic acid, ceramides, or niacinamide in your products. They help lock in moisture and support your skin’s barrier. Apply a rich moisturizer after bathing to seal in moisture and soothe dry skin.

Product Strategy for Combination Skin

Combination skin needs a balanced approach. Use a gentle, non-comedogenic cleanser all over. Apply a light moisturizer to oily areas and a richer one to dry areas. This way, you can get a balanced, healthy look.

Understanding your skin type is the first step to finding the right products. Whether you have oily, dry, or combination skin, there are products out there to help. They can make your skin look healthy and radiant.

Common Mistakes to Avoid in Skincare

Skincare can be tricky, with many products and routines to try. But, some mistakes can harm your skin. It’s key to have a skincare plan that fits your skin type, whether it’s oily or not.

Don’t overdo it with cleansing and product layers. Too much cleansing can dry out your skin. Too many products can clog pores and cause breakouts.

Over-cleansing and Its Effects

Over-cleansing can really hurt your skin. It can make your skin produce more oil, leading to dryness. Use a gentle cleanser and clean your face twice a day to avoid this.

Product Layering Mistakes

Layering too many products can also be bad. Stick to a few products that work well together. Here are some tips:

  • Choose a light moisturizer that won’t block pores
  • Don’t overdo exfoliation to avoid irritation
  • Go for products labeled “non-comedogenic” or “oil-free” to prevent breakouts

How to determine skin type: A guide to oily, dry, and combination skin.

By avoiding these mistakes, you can make a skincare routine that’s good for your skin. Always pick products that match your skin type. If you’re unsure, ask a dermatologist for advice.

Skin Type Skincare Tips
Oily Skin Use a gentle cleanser, avoid heavy moisturizers
Dry Skin Use a rich moisturizer, avoid exfoliating products
Combination Skin Use a balanced moisturizer, avoid heavy products on oily areas

Lifestyle Factors Affecting Your Skin Type

Many people focus on skincare products, but lifestyle matters too. A bad diet can make your skin dry. High stress can make oily skin worse. Simple lifestyle changes can help balance your skin and reduce the need for dry skin remedies.

A good skincare routine is key for healthy skin, no matter your type. Use gentle cleansers, moisturizers, and sunscreens that fit your skin. For combination skin, choose products that balance your face. A consistent routine and healthy choices can keep your skin looking great.

  • Diet: Eating fruits, veggies, and whole grains nourishes your skin and cuts down on dry skin remedies.
  • Stress: Too much stress can make oily skin worse. Less stress helps balance your skin.
  • Environment: Pollution, UV rays, and extreme weather can harm your skin and increase dry skin remedy needs.

Knowing these lifestyle factors and making small changes can balance your skin. This makes your skincare routine more effective for combination skin.

When to Consult a Dermatologist

Starting a skincare routine can take time and effort. Knowing when to ask for help is key. If you’ve tried different products and tips but see no change, it’s time to see a dermatologist. They can help with oily skin issues, which can be tough to handle.

Signs you might need a dermatologist include constant acne, too much oil, or dry skin that won’t get better. If you’re dealing with these problems, a dermatologist can offer the right advice. They can find out what’s causing your skin issues and suggest treatments.

A dermatologist can suggest treatments like medicines, peels, or lasers. They can also give you tips for your skin and create a routine just for you. Getting professional help is a big step towards better skin.

Skin Concern Treatment Options
Acne Prescription medications, blue light therapy
Excessive oil production Salicylic acid treatments, oil-controlling products
Dryness Moisturizing treatments, hyaluronic acid products

Conclusion: Embracing and Caring for Your Skin Type

Knowing your skin type is key to a healthy, glowing face. Tailor your skincare to fit your needs, whether it’s oily, dry, or a mix. Remember, your skin can change due to hormones, the environment, and your lifestyle.

Love your skin and take steps to keep it balanced. See a dermatologist often to check your skincare plan. With the right care, you can get a radiant face that shows off your beauty.

FAQ

What is the difference between oily, dry, and combination skin?

Oily skin has too much sebum, making it shiny and greasy. Dry skin lacks oil and moisture, causing tightness and flakiness. Combination skin has oily areas like the T-zone and drier cheeks.

How can I determine my skin type?

To find out your skin type, do a simple blotting test. Use a tissue or blotting paper to gently blot your face. If it’s oily all over, you have oily skin. If it’s dry, you have dry skin. If it’s oily only in the T-zone, you have combination skin.

What are the common characteristics of oily skin?

Oily skin is shiny, greasy, and has large pores. It often breaks out and has a thick texture. The T-zone is most oily.

How can I manage dry skin?

To care for dry skin, hydrate and nourish it. Use gentle cleansers and moisturizing creams or serums. Avoid harsh products and protect your skin from wind and cold.

What are the challenges of combination skin?

Combination skin’s biggest challenge is balancing oily and dry areas. The T-zone needs oil control, while cheeks need hydration. Finding the right products and skincare routine is key.

How do hormones and the skin’s natural moisture barrier affect skin type?

Hormonal changes can affect sebum production, changing your skin type. The skin’s natural barrier is vital for health and preventing moisture loss, which can lead to dry or oily skin.

What are some common mistakes to avoid in skincare?

Avoid over-cleansing, which removes natural oils. Also, don’t layer products incorrectly, as it can irritate or clog pores. Be gentle and effective with your skincare routine.

When should I consult a dermatologist?

See a dermatologist if your skin problems don’t improve with products and routines. Or if you have severe acne, rashes, or persistent dryness or oiliness.

Acne-Prone Skin Care: Effective Maintenance Tips

Did you know 85% of people deal with acne at some point? It’s a big skin issue. For those with acne-prone skin, keeping it healthy needs a good skincare routine. This routine can help cut down on breakouts and make your skin better.

Good tips for acne-prone skin include knowing the value of a daily skincare routine. Sticking to a routine and using the right products helps manage acne. It’s all about patience, dedication, and the right skincare for acne-prone skin.

Acne-prone skin care tips can help you maintain clear, healthy skin by following an effective routine. Managing acne requires the right products and techniques to prevent breakouts and irritation.

Top Acne-Prone Skin Care Tips to Prevent Breakouts

  • Acne affects a significant percentage of the population, making it a common skin concern.
  • Maintaining acne prone skin requires a consistent skincare routine for acne prone skin.
  • Proper care can reduce breakouts and promote healthier skin.
  • A daily skincare routine for acne prone skin is essential for managing acne-prone skin.
  • Using the right products is key for clearer, healthier-looking skin.
  • Maintaining acne prone skin is a long-term process that needs patience and dedication.

Effective Acne-Prone Skin Care Tips for Clear Skin

Acne-prone skin needs extra care and attention. To get tips for clear skin, knowing your skin type is key. This knowledge helps you create a skincare routine that fits your needs.

Understanding acne-prone skin involves many factors. Genetics, hormones, and the environment all play a part. Knowing these can help you manage your acne and get healthier skin.

Common Characteristics of Acne-Prone Skin

  • Increased oil production
  • Sensitivity to certain products or ingredients
  • Large pores, which can clog and lead to breakouts

Factors That Trigger Breakouts

Many things can cause breakouts in acne-prone skin. Hormonal changes, stress, and some medicines are common culprits. Knowing these can help you avoid them and reduce breakouts.

The Role of Genetics and Hormones

Genetics and hormones greatly affect acne-prone skin. Understanding their impact helps you create a better skincare plan. It also guides your decisions about your skin health.

Skin Type Characteristics Triggers
Acne-Prone Increased oil production, sensitivity Hormonal fluctuations, stress, certain medications
Normal Balanced oil production, minimal sensitivity None

Essential Steps for Maintaining Acne Prone Skin

Keeping your skin healthy is key when you have acne. By following important skincare steps, you can fight breakouts and get clear skin. Consistency and patience are vital in skincare.

First, understand the role of cleansing, moisturizing, and protecting your skin from the sun. These actions remove dirt and bacteria, keep your skin moist, and shield it from UV damage. Adding these steps to your daily routine can prevent acne and keep your skin healthy.

  • Avoid harsh products that take away your skin’s natural oils
  • Choose gentle, non-comedogenic products for acne-prone skin
  • Exfoliate often to clear out dead skin cells and block pores

By sticking to these skincare basics and adding acne prevention to your daily care, you can keep your skin healthy and clear. This will also help reduce breakouts.

Skincare Step Importance
Cleansing Removes dirt and bacteria
Moisturizing Hydrates the skin
Protecting Prevents damage from UV rays

The Perfect Morning Skincare Routine

Starting your day with a good morning skincare routine is key for healthy, acne-free skin. It’s important to pick gentle yet effective cleansers, treatments, and sun protection. A solid morning routine helps prevent breakouts and reduces inflammation.

To start, use gentle cleansing methods like washing with a mild cleanser and lukewarm water. This removes dirt without taking away your skin’s natural oils. Then, apply treatments like spot treatments or serums to tackle specific issues, like acne or dark spots.

Gentle Cleansing Techniques

Choose gentle, non-comedogenic cleansers for acne-prone skin. Options like Cetaphil Gentle Skin Cleanser or Neutrogena Hydrating Facial Cleanser are good. They clean and balance your skin without causing irritation or dryness.

Treatment Applications

After cleansing, apply treatments for specific skin issues. For acne, use products with salicylic acid or benzoyl peroxide. These reduce inflammation and prevent breakouts. Always start with a small amount to check for sensitivity.

By following these steps, you can better manage acne-prone skin and get a healthier, brighter look. Remember to be consistent and patient. It might take time to see the full effects of your new routine.

Nighttime Care Routine for Clear Skin

Managing oily skin starts with a good nighttime skincare routine. Our skin repairs and rejuvenates itself while we sleep. It’s important to give it the right care during this time. Nighttime skincare is more than just removing makeup and washing your face. It’s about balancing your skin’s natural oils and preventing acne.

To begin, gently remove your makeup with a cleanser. Make sure to clean every part of your face. Next, use a toner to balance your skin’s pH and get it ready for more treatment. For oily skin, choose products labeled “non-comedogenic” or “oil-free” to reduce pores and acne.

Here are some tips for an effective nighttime routine:

  • Cleanse your face with a gentle cleanser
  • Apply a toner to balance your skin’s pH
  • Use a spot treatment for any areas of congestion or acne
  • Apply a moisturizer to help hydrate and balance your skin

By following these steps and adding nighttime skincare to your daily routine, you can keep your skin clear and healthy. Be patient and consistent, as it may take time to see results. With the right products and dedication, you can get the clear, radiant skin you’ve always wanted. Mastering managing oily skin is possible.

Product Benefits
Gentle Cleanser Removes makeup and impurities without stripping the skin of its natural oils
Toner Helps to balance the skin’s pH and prepare it for further treatment
Spot Treatment Targets areas of congestion and acne to help reduce inflammation and prevent scarring
Moisturizer Hydrates and balances the skin, helping to reduce the appearance of fine lines and wrinkles

Choosing the Right Products for Acne-Prone Skin

Choosing the right products for acne-prone skin can be tough. There are so many options out there. It’s key to know what to look for to make sure they work well for your skin.

Good acne skincare solutions target the main causes of acne. Look for products that help with clogged pores and bacterial growth. Ingredients like salicylic acid and benzoyl peroxide are great. They help unclog pores and reduce inflammation.

Key Ingredients to Look For

  • Salicylic acid: helps to unclog pores and reduce inflammation
  • Benzoyl peroxide: kills bacteria that can cause acne
  • Tea tree oil: has antibacterial properties that can help to reduce acne

Ingredients to Avoid

Some ingredients can make acne worse. Avoid harsh chemicals, comedogenic substances, and artificial fragrances.

Product Recommendations by Skin Type

Skin Type Product Recommendation
Normal skin Gentle cleanser and moisturizer
Oily skin Oil-free cleanser and spot treatment
Dry skin Hydrating cleanser and moisturizer

By considering these factors and choosing the right products, you can develop an effective acne skincare routine. Always read the labels and pick products that fit your skin type.

Diet and Lifestyle Changes for Clearer Skin

For clearer skin, effective acne remedies mix skincare with diet and lifestyle changes. Eating fruits, veggies, and whole grains fights inflammation and boosts skin health. Drinking lots of water is key to flushing toxins and keeping skin moist.

Regular exercise reduces stress and boosts health, which helps skin look better. Getting enough sleep lets skin repair and grow. These diet and lifestyle changes can lessen acne and make skin look healthier.

Here are some tips for using effective acne remedies daily:

  • Eat a balanced diet with fruits, veggies, and whole grains.
  • Drink plenty of water to stay hydrated.
  • Exercise regularly to lower stress and improve health.
  • Ensure you get enough sleep for skin repair.

By making these simple diet and lifestyle changes, individuals can help to reduce their acne symptoms and achieve clearer, healthier-looking skin.

Advanced Treatment Options and Professional Care

For those with severe acne, acne treatment strategies must be more intense. Advanced treatment options offer various medical treatments and professional procedures. These help achieve clear skin.

Common treatments include antibiotics and isotretinoin. They can reduce inflammation and prevent scarring. It’s key to talk to a dermatologist to find the right treatment for you.

Medical Treatments

  • Antibiotics: used to reduce inflammation and prevent infection
  • Isotretinoin: a powerful medication used to treat severe acne

Professional Procedures

Professional procedures like blue light therapy and chemical peels are also effective. They help reduce inflammation, prevent scarring, and promote healthy skin.

By using advanced treatment options in your skincare routine, you can actively work towards clear, healthy skin. Always consult a dermatologist before starting any new treatments. They can guide you on the best path for your skin.

Treatment Benefits
Antibiotics Reduces inflammation, prevents infection
Isotretinoin Treats severe acne, reduces scarring
Blue Light Therapy Reduces inflammation, kills bacteria

Common Mistakes to Avoid in Acne Skincare

Keeping acne-prone skin healthy means knowing what not to do. Many people unknowingly harm their skin with simple mistakes. By steering clear of these errors, you can make your skincare routine more effective. This leads to clearer, healthier skin.

Don’t overdo it with cleansing and harsh treatments. Over-cleansing takes away your skin’s natural oils, causing dryness and irritation. Harsh treatments can also cause inflammation and damage. It’s important to use gentle, non-comedogenic products that are right for acne-prone skin.

Poor Habits That Worsen Acne

Poor habits like picking at pimples or not removing makeup right can make acne worse. These actions introduce bacteria, leading to infections and more breakouts. To avoid these, practice good skincare hygiene. This includes washing your hands before touching your face and removing makeup well before bed.

acne-prone skin care tips

Knowing and avoiding these common mistakes helps keep your skin healthy and acne-free. Remember, taking care of acne-prone skin needs patience, consistency, and gentleness. By avoiding these mistakes and following good skincare habits, you can get the clear, healthy skin you want.

Conclusion: Building a Sustainable Skincare Routine

Clear, healthy skin comes from a consistent, personalized skincare routine. You’ve learned that managing acne-prone skin starts with knowing your skin type and what triggers it. Then, you need a targeted regimen that meets your specific needs.

Getting and keeping clear skin is a journey, not a quick fix. Be patient and listen to your skin. Adjust your skincare routine for acne prone skin as you go. With effort and the right tips for clear skin, you can find a lasting way to handle breakouts and keep your skin glowing.

FAQ

What are the common characteristics of acne-prone skin?

Acne-prone skin often has more oil, bigger pores, and is sensitive. Knowing your skin well is key to fighting acne.

What are some factors that can trigger acne breakouts?

Hormonal changes, genetics, stress, some meds, and pollution can cause acne. A good skincare routine and lifestyle changes can help.

What are the essential steps for maintaining acne-prone skin?

For acne-prone skin, start with gentle cleansing and targeted treatments. Don’t forget to moisturize and protect from the sun. Finding the right routine takes time and patience.

What should a morning skincare routine for acne-prone skin include?

Morning care should include a gentle cleanser, treatment products, and a moisturizer with sun protection. Clean skin and sun protection are vital.

How should I care for my skin at night to maintain clear skin?

At night, remove makeup, oil, and dirt well. Then, apply treatments and a light moisturizer. This helps your skin repair itself while you sleep.

What key ingredients should I look for in skincare products for acne-prone skin?

Look for salicylic acid, benzoyl peroxide, retinoids, and tea tree oil. These help unclog pores and reduce inflammation. Avoid heavy oils and silicones that can clog pores.

How can diet and lifestyle changes help improve acne-prone skin?

Eating well, staying hydrated, managing stress, and sleeping enough can help. Foods rich in antioxidants or with anti-inflammatory properties may also help.

When should I consider seeking professional treatment for my acne?

See a dermatologist if your acne is severe, doesn’t get better with OTC treatments, or is persistent. They can offer medical treatments to clear your skin.

What common mistakes should I avoid in my acne skincare routine?

Avoid over-cleansing, harsh products, picking at pimples, and not removing makeup or sunscreen properly. These can make acne worse and irritate your skin.

Conceal Dark Circles Under Eyes: Tips & Tricks

Conceal dark circles under eyes effectively with the right makeup techniques and products. Dark circles can make you look tired, but with proper concealing methods, you can achieve a refreshed look. Finding the best under eye concealer is key to hiding dark circles. With the right products and techniques, anyone can look brighter and more awake.

Many people find it hard to hide dark circles under their eyes. The solution is to use the right concealer and techniques. By following the right tips, you can say goodbye to dark circles and hello to a brighter you.

Makeup Products to Conceal Dark Circles Under Eyes

  • Using the right tips dark circles under eye concealer can help achieve a flawless finish
  • Finding the best under eye concealer is critical to hide dark circles well
  • The right techniques and products can help master the art of concealing dark circles
  • Dark circles under the eyes can make anyone look tired and worn out
  • Using the right concealer and techniques can help achieve a brighter, more awake appearance
  • It’s essential to choose the right concealer for your skin type

How to Conceal Dark Circles Under Eyes: Best Tips & Tricks

Dark circles under the eyes can be a frustrating issue for many. To tackle this, it’s key to know what causes them. Genetics, lack of sleep, and poor circulation are common culprits. By understanding these causes, you can start looking for ways to hide or treat dark circles.

Some people see blue or purple discoloration under their eyes. This can be hard to cover up with regular makeup. Specialized concealers or techniques might be needed for the best results. Knowing the types of dark circles helps you choose the right solution.

Common Causes of Under-Eye Darkness

  • Genetics: Inherited traits can play a significant role in the development of dark circles.
  • Lack of sleep: Insufficient rest and sleep deprivation can cause puffiness and discoloration under the eyes.
  • Poor circulation: Reduced blood flow and oxygenation to the skin can contribute to the appearance of dark circles.

Different Types of Dark Circles

Dark circles can appear in various colors, like blue, purple, or brown. Each type needs a different approach to hide. Knowing the differences helps you find the best solution for your needs.

Step-by-Step Guide to Conceal Dark Circles Under Eyes

Choosing the right top rated under eye concealers is key to hiding dark circles. A good concealer can cover up imperfections and even out the under-eye area’s tone.

To get a natural look, pick a concealer that matches your skin tone. Here are some tips for applying concealer:

  • Start with a small amount of concealer on the inner corner of the eye. Work it outwards.
  • Blend the concealer gently into the skin. Make sure to cover the whole area.
  • Finish by dusting a light powder over the concealer. This prevents creasing and keeps coverage long-lasting.

By following these steps and using a quality concealer, you can hide dark circles. This will give you a brighter, more even-toned face. Always choose a top rated under eye concealer that fits your skin type and tone for the best look.

Preparing Your Under-Eye Area for Concealer

To get a flawless under-eye concealer look, start with the right prep. Use gentle cleansing techniques and choose products that fit your skin type. This is key if you have sensitive skin and need a dark circle concealer that’s gentle.

A good cleanser removes dirt without taking away your skin’s natural oils. This keeps your skin healthy and ready for concealer.

Eye cream is also a must for the delicate skin under your eyes. It hydrates and nourishes, reducing fine lines and wrinkles. Look for eye creams with hyaluronic acid, vitamin K, or caffeine to fight puffiness and dark circles.

Proper Cleansing Techniques

  • Use a gentle cleanser that suits your skin type
  • Avoid rubbing or pulling the skin under your eyes
  • Pat dry with a clean towel instead of rubbing

Importance of Eye Cream

Eye cream is a game-changer for your under-eye area. It hydrates and nourishes the skin, making fine lines and wrinkles less noticeable. Choose an eye cream with ingredients that target your specific concerns, like dark circles or puffiness.

Primer Application Tips

Primer is essential for a smooth base for your concealer. Look for a primer made for the under-eye area with silicones or peptides. Use a small amount and gently pat it in with your ring finger.

By following these tips and using a good dark circle concealer for sensitive skin, you can get a flawless, natural look.

Choosing the Right Concealer Shade and Formula

Choosing the right concealer shade and formula is key to hiding dark circles. It’s important to match the concealer to your skin tone for a natural look. This helps to blend the concealer seamlessly with your skin, making dark circles less noticeable.

Here are some tips dark circles under eye concealer to keep in mind:

  • Look for a concealer that is specially made for the under-eye area. These are thinner and gentler.
  • Choose a concealer that’s one shade lighter than your foundation to brighten the area.
  • Consider using a color-correcting concealer to neutralize dark circles.

By following these tips and choosing the right concealer, you can hide dark circles effectively. Remember to blend well and set with powder to keep it in place all day.

With the right concealer and application, you can say goodbye to dark circles. Hello to a brighter, more even-toned complexion.

Concealer Type Benefits
Color-correcting concealer Neutralizes dark circles, reduces appearance of puffiness
Under-eye concealer Thin, gentle formula, specially designed for under-eye area

Color Correction Techniques for Dark Circles

Color correction techniques can change the game when it comes to how to conceal dark circles. By learning about color theory, you can use correctors to hide dark circles. It’s all about finding the right concealer that matches your skin.

Understanding Color Theory

Color theory shows how colors can cancel each other out. For instance, green cancels red, and yellow cancels purple. Dark circles often look blue or purple, so yellow or peach correctors work best.

Using Color Correctors Effectively

To use color correctors right, start with a small amount on the dark circles. Use a brush or beauty blender to blend it in. Here are some top color correctors:

  • Yellow or peach for blue or purple circles
  • Green for red or pink circles
  • Purple for yellow or sallow skin

Layering Products Successfully

After applying the corrector, layer your regular concealer on top. Choose the best under eye concealer that matches your skin. By using color correction and layering, you can get a natural look and say goodbye to dark circles.

Color Corrector Discoloration
Yellow or Peach Blue or Purple
Green Red or Pink
Purple Yellow or Sallow

Professional Application Methods and Tools

Concealing dark circles under the eyes requires the right tools and techniques. Starting with a natural remedy for dark circles is a good step. But, investing in top rated under eye concealers is also key for lasting coverage.

For a professional look, use high-quality brushes and sponges. They help blend the concealer into the skin, making it look natural. Some top tools include:

  • Fluffy brushes for applying concealer to large areas
  • Small, precise brushes for targeting specific areas, such as the inner corners of the eyes
  • Beauty blenders for creating a smooth, airbrushed finish

Using the right tools is just the start. It’s also important to apply the concealer in thin layers. Let each layer dry before adding more. Blend well to avoid harsh lines. By following these steps and using top rated under eye concealers, you can get a professional finish. This will help hide dark circles and make your eyes look bright and refreshed.

How to conceal dark circles under eyes using a brightening concealer for a refreshed look

Special Techniques for Mature Skin

As we age, our skin changes a lot. It can look different in texture, tone, and appearance. To hide dark circles, mature skin needs special care and products. A good treatment can help reduce fine lines and wrinkles.

For mature skin, choose a concealer that’s gentle and nourishing. Look for products with hyaluronic acid, vitamin K, and peptides. These help keep the skin hydrated and plump. Some top picks for aging skin include:

  • NARS Radiant Creamy Concealer
  • Tarte Shape Tape Concealer
  • La Roche-Posay Pigmentclar Eye Cream

When applying concealer, use a light touch and build coverage slowly. This avoids cakeiness and highlights fine lines. The right products and techniques can make mature skin look more youthful and radiant.

Make sure to pick a concealer that matches your skin tone and type. Also, set it with a powder for lasting coverage. With the right concealer and techniques, you can say goodbye to dark circles and hello to a brighter you.

Product Key Ingredients Benefits
NARS Radiant Creamy Concealer Hyaluronic acid, vitamin E Hydrates and plumps the skin
Tarte Shape Tape Concealer Peptides, vitamin C Reduces fine lines and wrinkles
La Roche-Posay Pigmentclar Eye Cream Caffeine, vitamin K Reduces puffiness and dark circles

Preventing Concealer Creasing and Caking

To get a flawless look, it’s key to avoid concealer creasing and caking under the eyes. Using under eye concealer hacks, like setting with powder, is very effective. This simple trick can greatly improve the look of the under-eye area.

Using smart ways to hide dark circles can make you look more radiant and youthful. Tricks include applying a thin layer of concealer and blending gently. Also, setting the concealer with a light dusting of powder helps prevent creasing and caking. These steps ensure a smooth and even finish.

Setting Techniques

Setting the concealer with powder is a must to avoid creasing and caking. This method absorbs excess moisture and oil. A light dusting of powder keeps the concealer in place, giving a flawless finish that lasts.

Long-Lasting Application Tips

For a lasting look, use the right application techniques. Apply a thin layer of concealer and blend gently. Setting with powder is also key. Following these tips helps you achieve a flawless and long-lasting finish, making it easier to hide dark circles and look radiant.

By adding under eye concealer hacks and smart ways to hide dark circles to your daily routine, you can look more confident and radiant. With the right techniques and products, anyone can get a flawless and long-lasting finish. This makes it easier to face the day with confidence.

Concealer Type Setting Technique Long-Lasting Tip
Liquid Concealer Light dusting of powder Apply a thin layer and blend well
Cream Concealer Gentle patting motion Set with powder and blend edges
Stick Concealer Soft brush application Blend well and set with powder

Natural Alternatives and Lifestyle Changes

There are many natural ways to reduce dark circles under the eyes. Using tips dark circles under eye concealer can help hide them. But, making small changes in your daily life can also make a big difference.

Applying cucumber slices or tea bags to your eyes can help. Getting enough sleep and staying hydrated are key for healthy skin. By using these natural remedies and the best under eye concealer for your skin, you can look younger and more refreshed.

Here are some more tips to reduce dark circles:

  • Get at least 7-8 hours of sleep per night
  • Stay hydrated by drinking plenty of water throughout the day
  • Avoid smoking and limit alcohol consumption
  • Use a gentle eye cream to moisturize and nourish the skin

tips dark circles under eye concealer

By adding these natural methods and lifestyle changes to your routine, you can lessen dark circles. Choose the best under eye concealer for your skin. And use tips dark circles under eye concealer to cover the area.

Troubleshooting Common Concealer Issues

Concealing dark circles can be tricky. Several problems can make it hard to get a perfect look. Puffiness is one issue that can be fixed with a cold compress or natural remedies like cucumber slices or tea bags.

Another problem is when the concealer changes color or looks uneven. This is often due to oxidation. To avoid this, pick a high-quality concealer and use a primer. This helps the concealer stay even and prevents color changes. For a natural fix, try a concealer with green tea or chamomile. These ingredients can soothe the under-eye area.

Common Concealer Issues and Solutions

  • Puffiness: Use a cold compress or a natural remedy like cucumber slices or tea bags
  • Product oxidation: Choose a high-quality concealer and use a primer to prevent uneven color
  • Mid-day creasing: Set the concealer with powder and use a setting spray to extend wear

Understanding how to tackle common concealer problems can make a big difference. It helps you achieve a flawless look and boosts your confidence. Always choose a concealer that matches your skin type and tone. Don’t hesitate to try different techniques and products until you find what works for you.

Concealer Issue Solution
Puffiness Cold compress, natural remedy
Product oxidation High-quality concealer, primer
Mid-day creasing Set with powder, setting spray

Quick Fixes for On-the-Go Touch-Ups

Being on-the-go can make it hard to keep your makeup perfect. But, with the right tools and tricks, you can quickly fix your makeup. Top rated under eye concealers are key for hiding dark circles and blemishes.

A good dark circle treatment can really change how your under-eye looks. Here’s how to touch up your makeup fast:

  • Apply a small amount of concealer to the affected area
  • Blend well with a brush or beauty blender
  • Set with powder to prevent creasing

Having quick fixes ready can help you look great, even when you’re in a rush. Choose top rated under eye concealers

Product Benefits
Concealer Covers dark circles and imperfections
Powder Sets concealer and prevents creasing
Brush or beauty blender Blends concealer for a natural finish

Conclusion: Mastering Your Under-Eye Concealer Routine

Mastering under-eye concealer is key to looking radiant and youthful. Understanding dark circles and picking the right dark circle concealer for sensitive skin is important. Using the right techniques helps hide imperfections and shows your natural glow.

Using under-eye concealer hacks is a game-changer. These tricks help avoid creasing, caking, and oxidation. They make your concealer last longer and look flawless all day.

Improving your under-eye concealer routine takes time. Try different formulas, techniques, and tools to find what works best for you. With patience and practice, you’ll learn to hide dark circles and look radiant.

FAQ

What are the common causes of dark circles under the eyes?

Dark circles can come from genetics, not enough sleep, poor blood flow, allergies, and aging. Knowing what causes them helps you find the best way to hide them.

How do I choose the right concealer shade and formula for my dark circles?

Pick a concealer that matches your skin tone well. Choose a formula made for the under-eye area for hydration and coverage. Color-correcting concealers can also help hide dark circles.

What are the best techniques for applying concealer to dark circles?

Start by cleaning and moisturizing the under-eye area. Use a color-correcting concealer and blend it with a sponge or brush. Finish with translucent powder to keep it in place.

How can I prevent my concealer from creasing or caking under my eyes?

Use translucent powder to set your concealer. Choose a long-lasting, waterproof formula and apply in thin layers. Avoid too much, as it can look cakey.

What are some natural remedies for reducing the appearance of dark circles?

Cucumber slices, tea bags, and cold spoons can help by improving blood flow and reducing swelling. Getting enough sleep, staying hydrated, and using eye cream also help.

How can I troubleshoot common concealer issues, like puffiness or oxidation?

For puffiness, use a cooling eye cream before concealer. Choose a concealer with antioxidants or in a tube to avoid oxidation. For creasing, set with powder and carry blotting papers for touch-ups.

What are some quick fixes for on-the-go touch-ups?

Carry a concealer compact and setting powder in your makeup bag. Use blotting papers and a small brush for quick fixes. Focus on the most needed areas for a quick refresh.