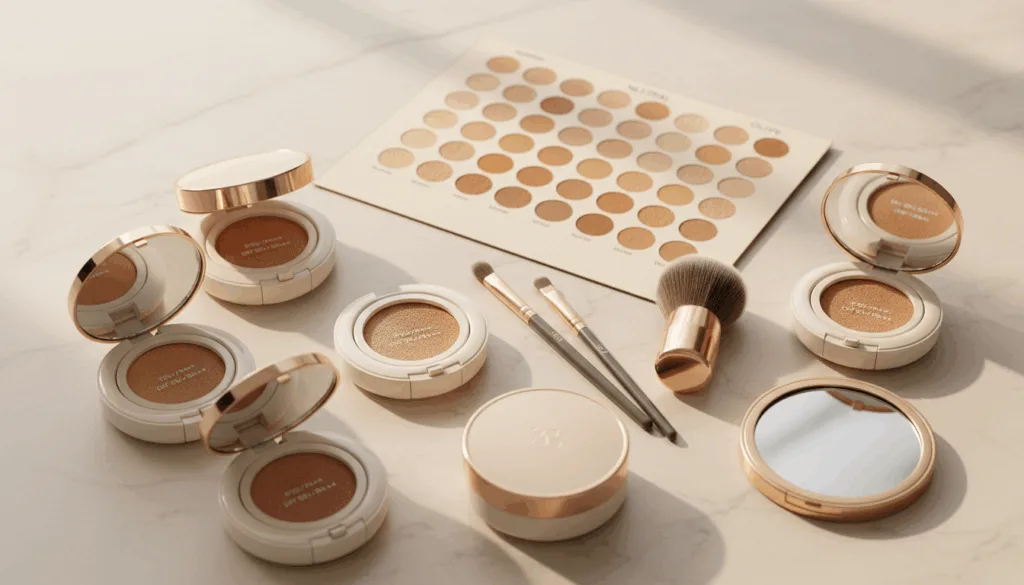
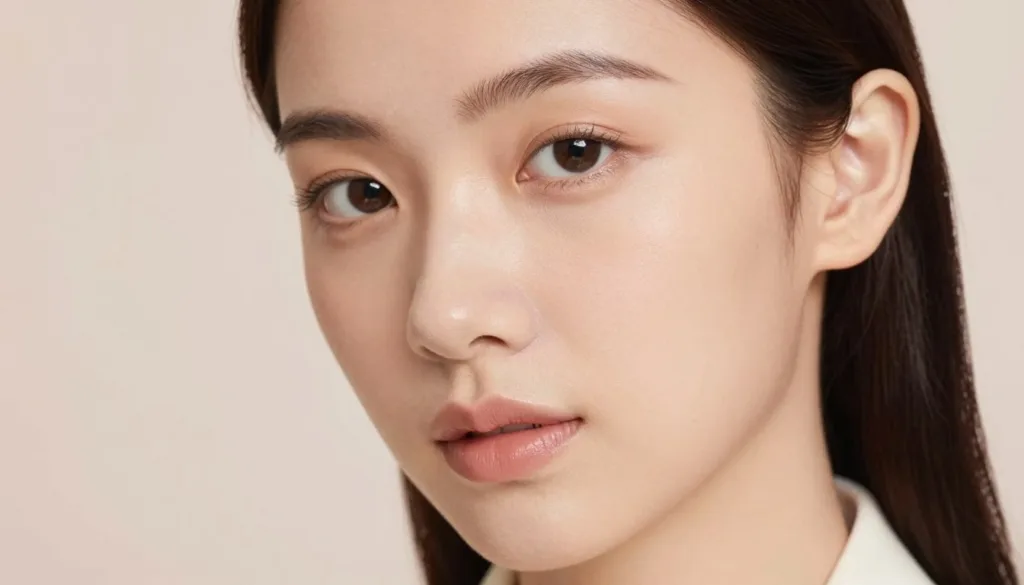
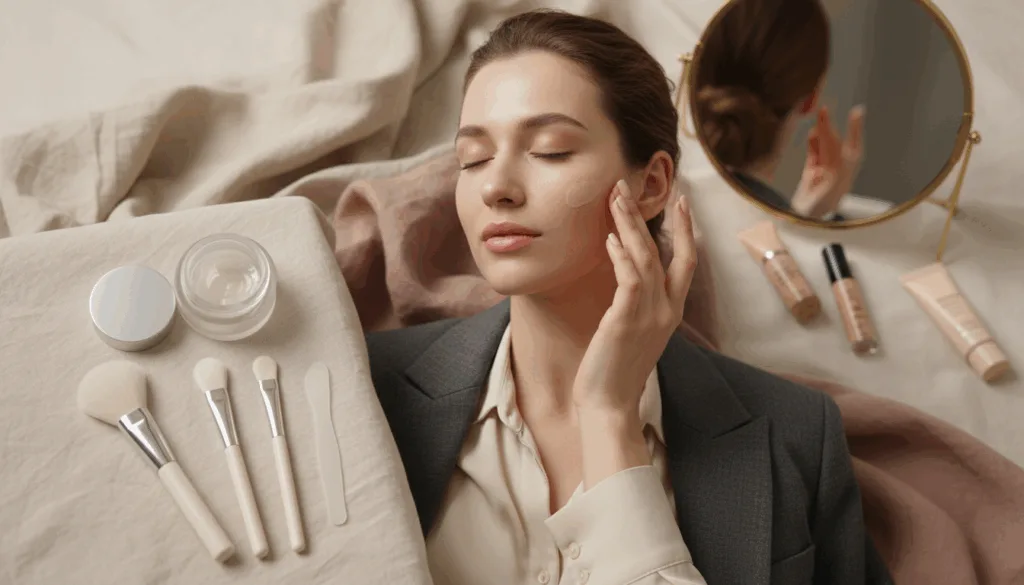
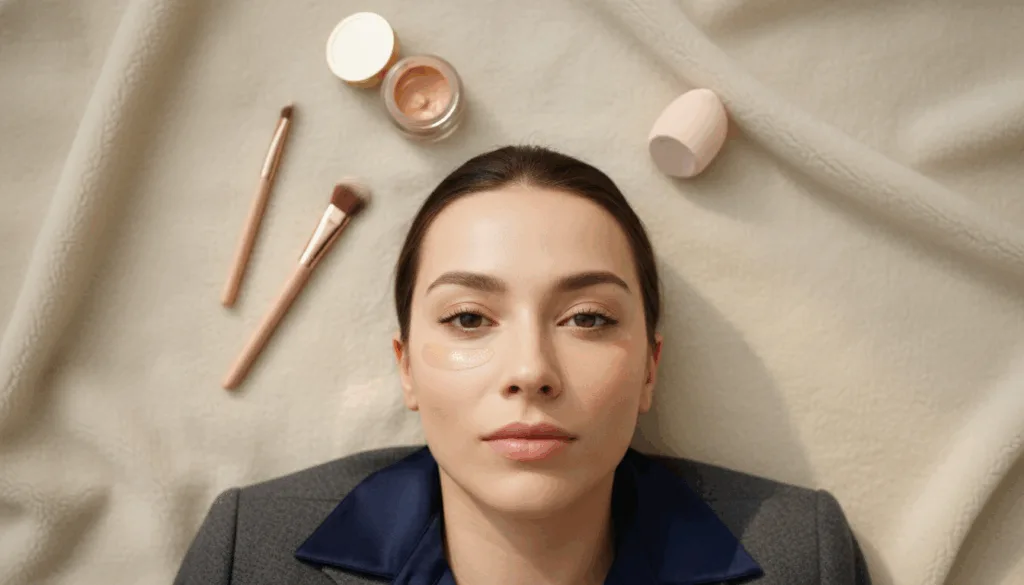
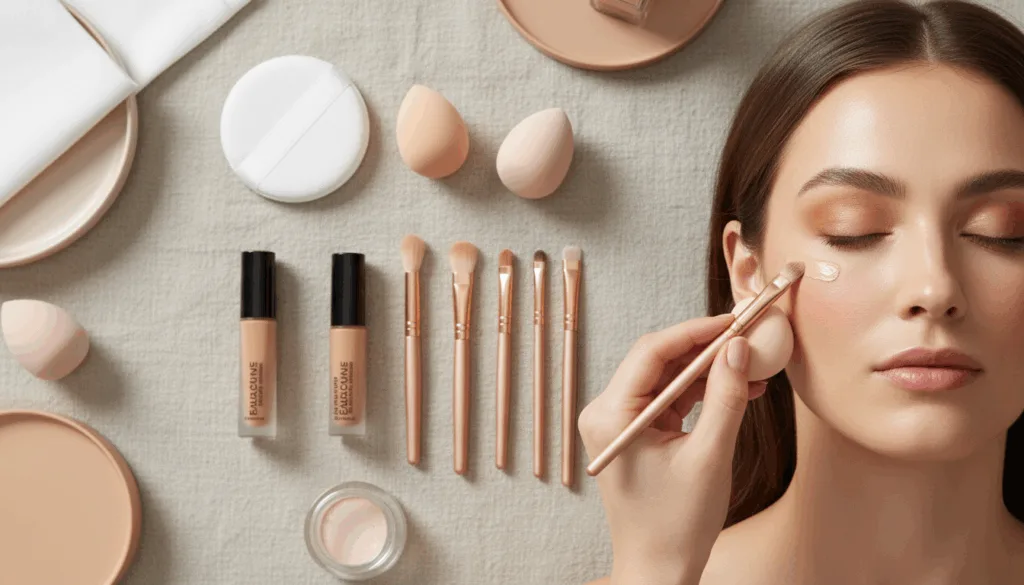
The Milk Skin trend is all about getting a creamy, soft, and dewy makeup look. It’s not about being greasy or shiny. Instead, it’s about blending skincare and makeup for a radiant glow.
To get this look, you need to focus on keeping your skin hydrated and nourished. A good skincare routine is essential. It should include exfoliating, hydrating, and protecting your skin. This way, you can get a smooth and glowing complexion, just like the Milk Skin trend.
Key Takeaways
Understand the importance of hydration and nourishment for your skin.
Combine the right skincare and makeup techniques.
Exfoliate, hydrate, and protect your skin for a radiant glow.
Focus on achieving a creamy, soft, and dewy finish.
Avoid greasy or glassy finishes for a natural look.
What is Milk Skin Makeup ( )?
Have you heard of milk skin makeup? It’s all about getting a creamy, soft, and dewy look. It’s about having a smooth, plump, and radiant complexion that looks healthy and bright.
The Essence of the Creamy Glow
Milk skin focuses on hydration and nourishment. To get this look, you need to use hydrating products like milky toners and nourishing serums. These products create a glowing base that’s key for the milk skin effect.
“Glowing skin represents hydrated, well-nourished skin that has a natural sheen.” Using the right products in your routine can give you a radiant look that’s both healthy and vibrant.
Milk Skin vs. Glass Skin: Understanding the Difference
Milk skin and glass skin both aim for a luminous look, but they’re different. Glass skin has a reflective, wet look, while milk skin is about a soft, dewy glow. Knowing the difference helps you choose the right milk skin products for your skin.
By understanding milk skin, you can customize your skincare and makeup. Whether you want a natural glow or a brighter look, milk skin beauty is versatile and appealing.
5-Step Guide to Achieving Perfect Milk Skin
To get that flawless, glowy complexion, follow our 5-step guide. Achieving the coveted milk skin look requires the right skincare, makeup techniques, and product choices.
Hydrating Skin Preparation
The first step to achieving milk skin is to ensure your skin is well-hydrated. Use products that help retain moisture in the skin. Exfoliation, hydration, and nourishment are key to getting that glowy complexion. Use a hydrating toner or essence to help lock in moisture, and follow up with a lightweight moisturizer that suits your skin type.
Skincare experts say, “Hydration is the foundation of a healthy, glowing complexion.” Proper hydration plumps up the skin, reducing fine lines and giving your skin a radiant appearance.
Applying Luminous Primer
Once your skin is prepped, apply a luminous primer to create a smooth canvas for your makeup. A luminous primer reflects light, giving your skin a natural glow. Apply a small amount all over your face or target areas where you want to enhance the glow.
Layering Foundation for a Soft Finish
The next step is to layer your foundation or skin tint in thin layers. This allows for buildable coverage without caking. Start with a small amount and gradually build up your coverage, blending well between layers. The goal is to achieve a soft, natural finish that doesn’t look heavy or cakey.
Use a foundation or skin tint that matches your skin tone.
Apply with a brush or beauty blender for a seamless finish.
Blend, blend, blend to ensure a natural look.
Adding Cream Blush and Highlight
To enhance your natural glow, add a cream blush to the apples of your cheeks. This gives your skin a healthy, rosy appearance. Follow up with a highlighter on the high points of your face, such as your cheekbones, nose, and cupid’s bow, to add dimension and glow.
“A well-placed blush and highlighter can make all the difference in achieving that milk skin look.”
Strategic Powder Application
The final step is to set your look with a strategic application of powder. Use a light dusting of translucent powder to set your makeup, focusing on areas where you tend to get oily. This helps to maintain the glow without looking shiny or oily.
By following these five steps and using the right products, you can achieve a flawless milk skin look that enhances your natural beauty.
Tips for Perfecting Your Milk Skin Look
To get a flawless milk skin look, think about your climate and skin type. In places like Singapore or Southeast Asia, use waterproof formulas and precision powdering. This helps keep your look fresh all day. For a creamy glow, try K-Beauty and C-Beauty products, or look for drugstore dupes.
If you have oily skin, oil-control powder pacts can be a big help. For older skin, focus on nourishment and hydration for a radiant glow. By using these tips, you can achieve a soft, glowing finish.
Keep up with the latest xhs makeup trends 2025 by trying new products and techniques. With the right approach, you can get a beautiful, lasting milk skin look.
FAQ
What is the main difference between milk skin and glass skin?
Milk skin has a soft, dewy look. Glass skin is shiny and wet-looking. Milk skin aims for a smooth, plump, radiant face.
How do I achieve milk skin?
To get milk skin, follow a 5-step process. Start with hydrating your skin. Then, apply a luminous primer.
Next, layer foundation or skin tint. Add cream blush and highlight. Finish with strategic powder application.
What skincare routine is best for achieving milk skin?
For milk skin, keep your skincare routine consistent. Exfoliate, hydrate, and protect your skin. Use milky toners, nourishing serums, and moisturizers to keep your skin moist.
What products should I use for milk skin makeup?
Try K-Beauty and C-Beauty products, or drugstore dupes for milk skin. If you have oily skin, use oil-control products. For mature skin, focus on nourishment and hydration.
How do I maintain my milk skin look throughout the day?
Use waterproof formulas and precision powdering to keep your look fresh. This is important in humid places like Singapore or Southeast Asia.
Can I achieve milk skin with oily skin?
Yes, oily skin can have milk skin. Use oil-control products and adjust your skincare and makeup routine.
Is milk skin suitable for mature skin?
Yes, mature skin can have milk skin. Focus on nourishment and hydration. Use products that deeply hydrate and nourish for a radiant glow.
How do I get a creamy glow with my makeup?
For a creamy glow, layer your foundation or skin tint thinly. Add cream blush and highlight to boost your natural glow.
Starting your makeup journey is both exciting and overwhelming. With so many products and techniques, it’s easy to feel lost. But, a simple routine can make a big difference.
To get a flawless look, following the right order of makeup application is key. Start with skincare prep, then primer, foundation or skin tint, and concealer. Next, add blush or bronzer, brows, eyes, lips, and finish with setting products. This order ensures a smooth, lasting finish.
By following this easy guide, you can create a beautiful, natural look. Whether you want a quick everyday look or something special for an occasion, learning the beginner makeup routine is the first step.
Key Takeaways
Start with skincare prep to create a smooth canvas.
Apply primer to help your makeup stay in place.
Use foundation or skin tint to even out your complexion.
Conceal imperfections with concealer.
Enhance your features with blush, bronzer, and brows.
Essential Makeup Products for Beginners
For beginners, knowing the basics of makeup is key. It’s not about having lots of products. It’s about knowing the essentials that make you look great.
Must-Have Products for Your First Makeup Kit
Your first makeup kit should have the basics. You’ll need primer, foundation, and concealer for a smooth base. Blush and bronzer add color to your cheeks. For your eyes, eyeshadow, eyeliner, and mascara are essential. Lastly, lip products complete your look.
Understanding Product Functions
Knowing what each product does is important. Primer makes your foundation last longer. Concealer hides blemishes and dark circles. Blush gives you a healthy glow, and bronzer makes your skin look sun-kissed.
Budget-Friendly Alternatives
You don’t have to spend a lot to look good. Look for affordable options from brands like Maybelline or Revlon. They offer quality products at a lower price.
Basic Tools You’ll Need
Having the right tools is as important as the products. You’ll need brushes and sponges for smooth application.
Brushes and Sponges Explained
Brushes have different uses. A foundation brush helps apply foundation evenly. A fluffy brush is great for blending eyeshadow. Sponges are perfect for applying foundation and concealer for a flawless look.
How to Care for Your Tools
To keep your brushes and sponges clean, wash them with mild soap and water. This prevents bacteria and makes them last longer.
Makeup Basics Every Beginner Should Know: Step-By-Step Application
Makeup can seem scary at first, but it’s easier when you break it down. Start with simple steps and you’ll get the hang of it. You’ll learn how to create a stunning look every day.
Prepping Your Canvas
Before you start with makeup, get your skin ready. This means two important steps: skincare and primer.
Skincare Essentials Before Makeup
Begin with a clean face. Use a gentle cleanser and then a moisturizer that fits your skin type. This keeps your skin hydrated and ready for makeup.
How to Apply Primer Correctly
Put a small amount of primer on your face, focusing on oily areas like the T-zone. Blend it in with your fingers or a brush for a smooth base.
Creating Your Base
Now that your skin is prepped, it’s time for foundation and concealer.
Foundation Application Techniques
Pick a foundation that matches your skin tone. Apply it with a brush or beauty blender, starting in the center and blending outwards.
Concealer Placement and Blending
Use concealer for blemishes and dark circles. Gently dab it with your ring finger, blending well into the skin around it.
Adding Color and Dimension
Adding color can make your features pop and give you a healthy glow.
Blush and Bronzer Placement
Put blush on the apples of your cheeks for a natural look. Use bronzer on high points like the forehead, cheekbones, and jawline for warmth.
Building Color Gradually
Start with light layers and build up. This helps you avoid looking too done-up and keeps your look natural.
Enhancing Your Features
Defining your features can really change your look.
Soft Brow-Filling Techniques
Fill in sparse areas of your eyebrows with a brow pencil, following their natural shape.
Simple Eye Makeup with Neutral Shades
Apply neutral eyeshadows on your lid, in the crease, and along the brow bone. This adds depth without looking too done-up.
Finishing Touches
The last steps are adding lip color and setting your makeup.
Lip Color Application
Choose a lip color that goes with your skin tone. Apply it with a lip brush for a precise look.
Setting Your Makeup to Last
End with a setting spray to keep your makeup in place all day.
By following these simple steps, you can create a beautiful, everyday look.
Common Makeup Mistakes and Easy Fixes
Starting your makeup journey means you’ll make some mistakes. One big error is not blending your foundation into your neck. This can make a line visible between your face and neck. To fix this, blend your foundation down towards your neck for a smooth finish.
Not powdering oily zones is another mistake, more so in humid climates. This can make your makeup slide off. Use a translucent powder to set your makeup in oily areas for a longer-lasting look. Make sure to include this step in your easy makeup routine for a flawless finish.
Using too much setting spray is another common mistake. While it’s great for keeping makeup in place, too much can make it look cakey. To get a natural look, use setting spray lightly. Hold the can 6-8 inches away from your face and spritz gently.
Knowing these common mistakes and their fixes can help you master makeup basics. You’ll get a beautiful, natural look. Keep practicing and trying new techniques to find what works best for you.
FAQ
What is the correct order of makeup application for beginners?
Start by priming your skin. Then, apply foundation and concealer. Next, use powder to set it.
After that, add color with blush and eyeshadow. Define your eyes with eyeliner and mascara. Finish with lip color and setting spray.
What are the essential makeup products for a beginner’s makeup kit?
You’ll need foundation or tinted moisturizer, concealer, and powder. Don’t forget blush, eyeshadow palette, eyeliner, and mascara.
Also, include lip balm or lipstick and a setting spray. Start with affordable options like Maybelline Fit Me foundation or NYX HD Concealer.
What are the basic makeup tools that I need to get started?
You’ll need a foundation brush or beauty blender, and a concealer brush. A powder brush and eyeshadow brush are also essential.
Don’t forget a mascara wand. A makeup sponge can help you achieve a flawless finish.
How do I choose the right foundation shade for my skin tone?
Test the foundation on your jawline to see if it blends in. Ask for help at a makeup counter if needed.
Online tools like MAC Virtual Try-On or Estee Lauder Shade Finder can also help.
What are some common mistakes that beginners make when applying makeup?
Common mistakes include not blending foundation into the neck and not powdering oily zones. Overusing setting spray and neglecting to define brows are also mistakes.
Practice makes perfect. Watch online tutorials for tips and tricks to avoid these mistakes.
How can I make my makeup last longer throughout the day?
Prime your skin and use a long-lasting foundation. Set your makeup with powder and setting spray.
Touch up throughout the day. Use a makeup setting spray like Urban Decay All Nighter to keep your look in place.
What are some beginner-friendly makeup tutorials that I can follow?
Look for beginner-friendly makeup tutorials on YouTube, Instagram, and beauty blogs. Choose tutorials that use simple, everyday products.
Follow along with step-by-step instructions. This will help you learn and practice.
Are you tired of your undereye concealer settling into fine lines by midday? Suzy Gerstein, a Manhattan-based celebrity makeup artist, says, “You can minimize creasing, but it’s not always possible to prevent it.” This doesn’t mean you can’t achieve a smooth, crease-free finish.
To get started, it’s key to understand why your concealer might be creasing. Preparing your undereye area properly and following a step-by-step application guide can make a big difference.
Key Takeaways
Understand why undereye concealer creases
Learn how to prepare your undereye area for concealer
Follow a simple, step-by-step application guide
Discover beginner-friendly makeup tips for a flawless finish
Minimize creasing with the right concealer routine
Why Your Undereye Concealer Creases
Knowing why undereye concealer creases is key for a perfect makeup look. Many things can cause this problem, like the natural look of our skin and the weather.
Natural Causes: Fine Lines and Facial Movement
Fine lines and how we move our faces are big reasons. As we get older, these lines get deeper. This makes it harder for concealer to stay put. Also, when we blink or smile, our skin folds, causing creases.
Product-Related Issues: Formula and Application
The type of concealer and how you apply it matter a lot. If the concealer is too thick or doesn’t match your skin, it can make creases worse. Putting on too much at once can also make it look cakey and creasey.
Environmental Factors: Humidity and Temperature
The weather can also affect your concealer. When it’s humid, our skin gets oily. This can make the concealer break down and crease.
Factor
Effect on Concealer
Prevention Tip
Fine Lines
Concealer settles into lines
Use a primer to smooth the area
Facial Movement
Causes skin to fold and crease
Apply concealer in thin layers
Humidity
Leads to oiliness and concealer breakdown
Set concealer with powder
By knowing these reasons, you can stop undereye concealer from creasing. This will help you get a smoother, longer-lasting makeup look.
Preparing Your Undereye Area
A smooth, crease-free concealer application starts with a well-prepared undereye area. Focus on a few key steps to get the most from your undereye concealer.
Choosing the Right Eye Cream
Choosing the right eye cream is the first step. Min Min Ma, a New York City-based celebrity makeup artist, suggests a lightweight eye cream to avoid creases. Look for one with emollients and antioxidants to hydrate and protect your delicate eye skin.
Hydrating ingredients like hyaluronic acid
Peptides for skin elasticity
Antioxidants to combat free radicals
Allowing Products to Fully Absorb
After eye cream, let it fully absorb before applying concealer. This step hydrates and primes your skin for makeup. Waiting a few minutes or gently patting helps absorption.
Selecting the Best Concealer Formula
The right concealer formula is key for staying in place. Choose a “long-lasting” or “crease-resistant” concealer. Thicker formulas are better at covering dark circles and staying put all day.
How to Apply Undereye Concealer So It Doesn’t Crease
To get a smooth, crease-free look under your eyes, follow a specific process. Choose the right tools and techniques for a flawless finish that lasts.
Step 1: Apply a Thin Layer of Concealer
Start with a thin layer of concealer under your eyes. Use a brush or a damp sponge for this.
Brush Application Method
A brush lets you apply concealer precisely. Gently sweep the brush across the undereye area, staying within the orbital bone.
Damp Sponge Technique
A damp Beautyblender or sponge gives a seamless finish. Dab the sponge gently into the skin, blending the concealer evenly.
Step 2: Blend and Wait
Blend the concealer into your skin with gentle patting. Wait a few minutes for it to set before moving on.
Step 3: Set Your Concealer Properly
Setting the concealer is key for lasting results. The “Setting Spray Sandwich” technique is effective.
The “Setting Spray Sandwich” Method
First, spray a light setting spray. Then, dust translucent powder over it. Finish with another light spritz of setting spray. This “sandwich” keeps the concealer in place, preventing creases.
Step 4: Touch-up Techniques for Long-Lasting Wear
To keep your look crease-free all day, use touch-up techniques. Pat a small amount of concealer over creased areas and set with powder.
By following these steps and techniques, you can achieve a smooth, crease-free undereye area that enhances your overall makeup look.
Conclusion: Troubleshooting Tips for Different Skin Types
Keeping your under-eye area crease-free can be tough, depending on your skin type. For those with mature skin, applying a hydrating eye cream first can help. It reduces fine lines and wrinkles.
If you have oily skin, a primer can make your skin smooth for concealer. In humid places, blotting before you touch up can prevent a cakey look. This advice comes from Min Min Ma.
To get a perfect look, start with a good concealer routine. Choose products that won’t crease and apply makeup that stays put in humidity. These tips will help your under-eye area stay smooth and crease-free all day.
Choosing the right products and techniques is key for a crease-free under-eye area. This way, you can enjoy a smooth, flawless look that lasts all day.
FAQ
Why does my undereye concealer crease even after following a skincare routine?
Creasing under the eyes can happen for many reasons. It might be due to natural factors, the type of products you use, or even the environment. To stop creasing, it’s key to know why it happens and take steps to fix it. This includes using the right eye cream and concealer for your skin.
What is the best concealer formula for mature skin to prevent creasing?
For older skin, look for a concealer that’s hydrating. Ingredients like hyaluronic acid or glycerin are good because they moisturize and plump the skin. This helps reduce fine lines and wrinkles. Also, choose a concealer that’s labeled “crease-resistant” or “long-lasting” for the best results.
How can I prevent my undereye concealer from creasing in humid climates?
In humid weather, use a light, oil-free concealer made for humid environments. Apply a setting powder and then a setting spray to make it last. You might also want to use a humidity-proof undereye primer to protect your skin and concealer.
What is the “setting spray sandwich” method, and how does it help prevent creasing?
The “setting spray sandwich” method means spraying setting spray before and after applying concealer. This creates a barrier that keeps the concealer smooth and prevents creasing. The setting spray also helps the concealer stay in place all day.
Can I use a regular moisturizer as an eye cream to prepare my undereye area for concealer?
While regular moisturizer can hydrate the undereye area, it’s not the best for getting ready for concealer. Eye creams are made to tackle dark circles, puffiness, and fine lines. They’re better at creating a smooth surface for concealer.
How often should I touch up my undereye concealer throughout the day?
How often you need to touch up your concealer depends on your skin, the concealer, and the environment. Generally, you might need to touch up every 4-6 hours to keep it crease-free. Use a concealer brush or a damp sponge to blend and re-set as needed.
Are you tired of your makeup melting away by lunchtime in Singapore’s sweltering heat? You’re not alone. The high humidity can be challenging for maintaining a flawless look throughout the day.
To achieve a long-lasting and sweat-proof makeup look, it’s essential to start with the right skin preparation. According to makeup artist Marie Soh, prepping your skin with a lightweight moisturizer and primer is crucial. This helps create a smooth canvas for your makeup, ensuring it stays in place longer.
Choosing the right products is also vital. Opt for humidity-resistant formulas that are designed to withstand the heat. By combining proper skin preparation with the right products, you can enjoy a flawless makeup look that lasts all day.
Key Takeaways
Prep your skin with a lightweight moisturizer and primer.
Choose humidity-resistant makeup formulas.
Use a good primer without too much silicone.
Set your makeup with loose powder and setting spray.
Layer your makeup strategically for a long-lasting look.
The Singapore Humidity Challenge
Singapore’s hot and humid weather requires a special makeup approach. The heat and moisture can make makeup melt or wear off fast. This makes it hard to keep a perfect look all day.
How Heat and Humidity Affect Your Makeup
High humidity and heat make you sweat more. This can ruin your makeup. Choosing the right products and techniques is key. For example, using light, oil-free makeup helps it stay put in humid weather.
Why Traditional Makeup Techniques Fail in Tropical Weather
Old makeup methods don’t work well in hot, humid places like Singapore. Using products and techniques made for humidity is essential. This means using sweat-proof makeup and applying it lightly to avoid a heavy look.
Essential Prep Steps to Make Makeup Last in Humid Weather
In humid places like Singapore, getting ready right can really help your makeup last. It’s key to prep your skin before makeup to keep it looking good all day.
Lightweight Gel Moisturizers for Tropical Climates
Start with a lightweight gel moisturizer. These moisturizers soak into your skin fast, giving it moisture without feeling oily. They’re great because they don’t clog pores.
Selecting the Right Mattifying SPF
Mattifying SPF is next. It protects your skin from the sun and keeps it from getting shiny. Pick a broad-spectrum SPF that also controls shine to keep your makeup in place.
Gripping Primers: Your Humidity Defense Shield
A gripping primer is like a shield for your skin. It makes your makeup stay on longer and look better. It’s perfect for humid weather because it keeps your makeup from melting off.
Product Type
Key Benefits
Recommended For
Lightweight Gel Moisturizer
Hydrates without greasiness, quick absorption
Humid climates, oily skin
Mattifying SPF
Sun protection, controls shine, mattifying finish
Daily use, oily skin, humid weather
Gripping Primer
Creates a smooth canvas, improves makeup longevity
All skin types, especially in humid weather
Humidity-Proof Application Techniques
To keep your makeup looking great in Singapore’s humid weather, learn the right techniques. The right methods can make a big difference in how long your makeup lasts and looks good all day.
Building Thin Layers of Foundation and Concealer
Begin with a lightweight foundation that matches your skin. Use a beauty blender or a foundation brush for a thin layer, adding coverage only where needed. This avoids a cakey look that humidity can make worse. Then, apply concealer only on blemishes or dark circles, blending well for a smooth finish.
The Cream-Before-Powder Rule for Cheek Products
For a natural-looking flush, apply cream blush before powdering. Cream products stick better to the skin, making a good base for powder. Apply cream blush lightly, then set it with a powder blush of the same shade for lasting color.
Waterproof Eye and Lip Products That Withstand Sweat
Use waterproof or water-resistant eye and lip products to fight humidity. Waterproof mascaras, eyeliners, and lip colors stay in place even when you sweat. Look for “waterproof” or “smudge-proof” labels for the best results.
The Setting Spray Sandwich Method
To keep your makeup in place, try the setting spray sandwich method. Spray after primer, again after foundation, and once more after powder. This creates a strong barrier against humidity, keeping your makeup in place all day.
By adding these techniques to your makeup routine, you can have a flawless look even in humid weather. Waterproof makeup and makeup setting spray are key to fighting humidity, keeping you looking fresh from morning to night.
Troubleshooting and Touch-ups for All-Day Wear
Even with the best makeup, humid weather can still cause problems. It’s key to have some quick fixes ready.
Managing Mid-Day Shine in Your T-Zone
Oil-absorbing sheets are a must in humid weather. They help soak up extra oil without messing up your makeup. For a fast fix, lightly dust translucent powder on your T-zone.
Strategic Touch-up Kit for Singapore’s Climate
Put together a touch-up kit with must-haves like oil-absorbing sheets, a compact powder, and setting spray. Here’s a simple table to help you organize your kit:
Product
Purpose
Oil-absorbing sheets
Blot excess oil
Compact powder
Mattify T-zone
Setting spray
Lock makeup in place
With these tips and a well-stocked touch-up kit, you’ll enjoy long-lasting, sweat-proof makeup in Singapore’s humid climate.
Conclusion
To keep your makeup looking great in Singapore’s humid weather, you need to adjust your routine. Start by prepping your skin right. Use lightweight gel moisturizers and mattifying SPF to get a smooth base.
Then, apply gripping primers to protect your makeup from humidity. This way, your makeup stays put all day.
Try out different products and methods to find what works best for you. Build your makeup in thin layers. Use the cream-before-powder rule for cheeks, and choose waterproof eye and lip products.
With these tips, you can handle Singapore’s climate and look fresh all day. Makeup that lasts in heat and humidity is possible with the right products and techniques.
FAQ
What is the best way to keep my makeup from melting in Singapore’s humid weather?
To keep your makeup from melting, start with a lightweight gel moisturizer. Then, apply a mattifying SPF and a gripping primer. Use thin layers of foundation and concealer. Finally, set your look with a setting spray.
How can I prevent my T-zone from getting oily throughout the day?
To manage oil, use oil-absorbing sheets to blot excess oil. Carry a translucent powder for touch-ups. Consider a mattifying powder or oil-control primer for a matte look.
What type of products should I use for a sweat-proof makeup look?
For sweat-proof makeup, choose waterproof eye and lip products. Use a cream-before-powder rule for cheeks. Opt for humidity-resistant foundation and concealer. Set your look with a setting spray for longer wear.
How often should I touch up my makeup in humid weather?
In humid weather, touch up makeup every few hours. Use a touch-up kit with oil-absorbing sheets, translucent powder, and lip balm. This keeps your makeup looking fresh all day.
Can I use a regular primer in humid weather, or do I need a special one?
In humid weather, use a gripping primer designed for humidity. Look for “humidity-resistant” or “sweat-proof” labels. This helps your makeup stay in place.
Are there any specific makeup setting sprays that work well in humid weather?
Yes, many setting sprays are made for humid weather. Look for “long-lasting” or “humidity-resistant” labels. The setting spray sandwich method also helps lock makeup in place.
The Korean skincare and makeup world is on the verge of a big change. People want highly functional and personalized beauty products more than ever. Now, the focus is on bioactive ingredients and AI-powered personalization.
You’re now part of a beauty world that loves intelligent minimalism. Products are not just good; they’re also backed by science. New ingredients and tech are changing skincare routines, making them better and more personal.
Key Takeaways
The K-Beauty industry is embracing bioactive ingredients for enhanced product efficacy.
AI-powered personalization is becoming a key trend in skincare.
Intelligent minimalism is driving the demand for multifunctional beauty products.
Scientific research is playing a critical role in shaping the future of beauty.
Personalized skincare routines are on the rise, thanks to technological advancements.
The Science Revolution in 2026 K-Beauty Trends
K-Beauty trends in 2026 are all about science. They aim to rejuvenate and transform your skin. The K-Beauty industry is moving towards advanced and effective skincare. This is thanks to the latest scientific research and technology.
Bioactive and Regenerative Ingredients Taking Center Stage
The focus is now on bioactive beauty ingredients. These ingredients stimulate cellular regeneration. They offer more than just superficial benefits.
These ingredients are changing how we approach skincare. They provide targeted solutions to various skin concerns.
Exosomes, PDRN, and Lab-Grown Ceramides
Exosomes, PDRN, and lab-grown ceramides are leading the trend. Exosomes stimulate cellular communication and promote tissue repair. They are a key part of regenerative skincare korea.
PDRN, from salmon sperm, has anti-inflammatory and regenerative properties. Lab-grown ceramides strengthen the skin barrier. Together, they are set to change the skincare landscape.
The K-Beauty industry is evolving fast. Exosome and pdrn beauty technologies are key to its future. They address skin concerns at a cellular level. This is set to revolutionize skincare.
Functional Minimalism: The New K-Beauty Philosophy
Functional minimalism is now a big deal in K-Beauty for 2026. It’s changing how we do skincare and makeup. This trend means finding products that are simple yet effective.
Intelligent Multitasking Products Replacing Traditional Routines
The move to minimalism is thanks to intelligent multitasking products. These products do more than one thing at once. They make your beauty routine simpler, helping you look great with fewer steps.
For example, a product that moisturizes, primes, and covers is now common in K-Beauty.
Hybrid Formulations Merging Skincare with Makeup
Hybrid formulations are also key in functional minimalism. They mix skincare with makeup. Think tinted moisturizers with SPF and foundations that also care for your skin.
These products make your routine easier and give your skin extra benefits.
The Evolution of SPF Products as Daily Essentials
SPF products are now seen as daily essentials. They protect and also look good. You want products that shield well, are light, and don’t mess with your makeup or skincare.
The spf makeup trend is about protecting your skin while looking flawless.
Functional minimalism means a simpler beauty routine. It’s about choosing quality over quantity. This new way of thinking is making your daily beauty routine more efficient and effective.
Conclusion: How 2026 K-Beauty Embraces Your Complete Self
The 2026 K-Beauty trends are changing your beauty routines. They focus on wellness and personal experiences. Beauty influencers are key in shaping these trends, driving innovation, and setting new standards.
You’re leading this beauty change, with products and packaging that feel good. The K-Beauty industry sees you as a whole person, from skincare to makeup. It offers smart products and blends that simplify your beauty routine, helping you look flawless and radiant.
Exploring these trends means embracing a more holistic beauty approach. It’s about your well-being and self-care. With K-Beauty at the forefront, you’re in for a more personalized, fun, and effective beauty journey.
FAQ
What are the key trends in K-Beauty for 2026?
In 2026, K-Beauty will focus on bioactive and regenerative ingredients. You’ll see functional minimalism and hybrid products that mix skincare with makeup. Expect more personalized and effective products backed by science.
What are exosomes and PDRN, and how do they benefit the skin?
Exosomes help with cellular communication and tissue repair. PDRN, from salmon sperm, fights inflammation and regenerates skin. These ingredients are set to change skincare by targeting specific skin issues more effectively.
What is functional minimalism in K-Beauty, and how is it changing skincare routines?
Functional minimalism means using smart, multitasking products. You’ll find hybrid formulas that simplify your routine. Tinted moisturizers with SPF and makeup with skincare benefits are becoming popular for their simplicity and efficiency.
How is technology shaping the K-Beauty industry in 2026?
Technology is key in 2026’s K-Beauty, with AI for personalized skincare and lab-grown ingredients like ceramides. Expect products tailored to your skin’s needs and concerns.
What is the significance of SPF makeup in the K-Beauty trend?
SPF makeup is becoming a daily must in K-Beauty. It offers protection and cosmetic benefits. Look for products that combine skincare, makeup, and SPF for easy, protected beauty.
How are K-Beauty trends influencing the global beauty industry?
K-Beauty trends are leading to innovation and new beauty standards worldwide. There’s a focus on sensory experiences through products and packaging. Enjoyable beauty rituals and personalized products are becoming more popular.
Are you using the right powder for your makeup routine? Many of us get setting and finishing powders mixed up. But, they have different jobs.
Setting powders help keep your foundation and concealer in place. They control shine and make your makeup last longer. Finishing powders, on the other hand, give your look a final touch. They smooth out your skin and make it look soft and even.
Knowing the difference between these powders is key to getting the makeup look you want. The right powder can make your natural beauty shine and keep your makeup looking great all day.
Key Takeaways
Setting powders set foundation and concealer, while finishing powders blur texture and soften lines.
Choose a setting powder to control shine and extend makeup wear.
Opt for a finishing powder to add a soft-focus effect and blur imperfections.
Understanding your skin type and makeup goals is crucial for selecting the right powder.
Using the right powder can enhance your natural beauty and ensure long-lasting makeup.
Setting Powder vs Finishing Powder: Understanding the Key Differences
Knowing the difference between setting and finishing powders is key to a perfect makeup look. You might wonder what makes these powders unique and how they can improve your beauty routine.
Primary Functions and Benefits
Setting powder is made to set your makeup, controlling shine and making it last longer. It keeps oiliness at bay and keeps your makeup in place all day. Finishing powder, on the other hand, blurs texture and softens lines for a smooth finish. It’s the final step to perfect your skin.
Product Formats: Loose vs Pressed Options
Both types of powders come in loose and pressed forms. Loose powders let you customize your application. Pressed powders are great for quick touch-ups on the go. Your choice depends on your makeup style and needs.
Color Varieties: Translucent vs Tinted Formulas
Setting and finishing powders are available in translucent and tinted shades. Translucent powders work for most skin tones. Tinted powders can boost your natural color. Pick the right shade based on your skin and desired look.
Powder Type
Primary Function
Product Formats
Color Varieties
Setting Powder
Sets makeup, controls shine
Loose, Pressed
Translucent, Tinted
Finishing Powder
Blurs texture, softens lines
Loose, Pressed
Translucent, Tinted
How to Use Setting Powder for Long-Lasting Makeup
Setting powder is key to long-lasting makeup. It makes a big difference in how your makeup looks all day.
Step-by-Step Application Techniques
Start by tapping a small amount of setting powder onto your hand. Then, use a brush or puff to apply it to your skin. Focus on oily or worn areas.
Best Practices for Oily and Combination Skin
If you have oily or combination skin, target the T-zone. Use a light touch to avoid more oiliness. Look for “matte” or “oil-control” products for extra help.
Troubleshooting: How to Prevent Cakiness
To avoid cakiness, tap off extra powder and apply lightly. If it happens, gently buff with a clean brush.
Application Tip
Benefit
Tap off excess powder
Prevents cakiness
Use a light hand
Avoids exacerbating oiliness
Target the T-zone
Controls shine and extends makeup wear
Applying Finishing Powder for a Flawless Look
Finishing powder is key for a camera-ready face. It’s used at the end of your makeup routine. It blurs texture and softens lines, making your skin look smooth and even.
Perfect Timing: When to Add Finishing Touches
Timing is crucial for applying finishing powder. Do it after you’ve finished your makeup. This step keeps your makeup in place and looking perfect in photos.
Techniques for Blurring Texture and Softening Lines
When applying finishing powder, use a light touch. Focus on areas like the eyes and mouth. Use a large powder brush to dust the powder gently over these spots.
Avoiding Photo Flashback with Silica-Based Products
Silica-based powders can prevent photo flashback. They reduce pores and fine lines. Choose products with silica and apply them lightly for a natural look.
Here’s a comparison of different finishing powders and their characteristics:
Product Type
Key Ingredients
Benefits
Soft Focus Finishing Powder
Silica, Talc
Blurs texture, softens lines
Blur Effect Powder
Silica, Dimethicone
Reduces appearance of pores, fine lines
Translucent Finishing Powder
Titanium Dioxide, Silica
Sets makeup, reduces shine
Conclusion: Selecting the Right Powder for Your Skin Type and Makeup Goals
Choosing between setting powder and finishing powder depends on your skin type and makeup goals. It’s important to know the differences to get a flawless look.
For oily skin, setting powder helps control shine and keeps makeup in place longer. Finishing powder is better for blurring texture and softening lines. Think about your skin type and makeup needs when deciding.
Having the right powder is key in cosmetics and beauty. The right choice gives you a flawless, long-lasting finish. Whether you love makeup or are just starting, knowing about setting and finishing powders can improve your look.
FAQ
What’s the main difference between setting powder and finishing powder?
Setting powder helps set makeup, control shine, and make it last longer. Finishing powder adds a final touch, smooths out imperfections, and gives a soft look.
How do I choose between setting powder and finishing powder for my skin type?
For oily skin, setting powder is best to keep shine away and extend makeup wear. Finishing powder is great for blurring texture and softening lines.
What’s the best way to apply setting powder to prevent cakiness?
To avoid cakiness, tap off extra powder and apply lightly. Focus on oily areas like the T-zone.
How do I use finishing powder to blur texture and soften lines?
Apply finishing powder lightly, focusing on needed areas. Blend well for a smooth finish.
What’s the perfect timing for applying finishing powder?
Apply finishing powder last in your makeup routine. It adds a final touch and smooths out imperfections.
Can I use setting powder and finishing powder together?
Yes, you can use both. Start with setting powder to set makeup, then finish with finishing powder for a smooth look.
How do I avoid photo flashback when using silica-based finishing powders?
Silica-based products can reduce pores and lines, helping avoid photo flashback. Look for silica in products and apply lightly.
What’s the difference between loose and pressed powder formats?
Loose powders are good for setting and finishing. Pressed powders are easy for quick touch-ups on the go.
Can I use a tinted powder if I have a cool skin tone?
Yes, but pick a tinted powder that matches your skin tone. This avoids looking unnatural or orange.
How often should I reapply setting powder throughout the day?
Reapply setting powder as needed, usually every 4-6 hours. Do this when you notice your makeup wearing off or getting oily.
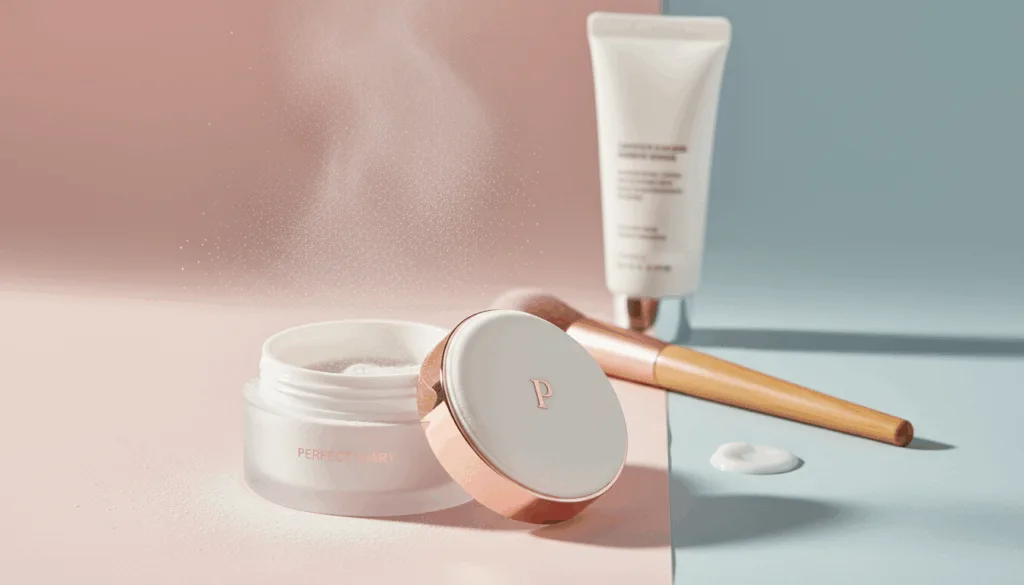
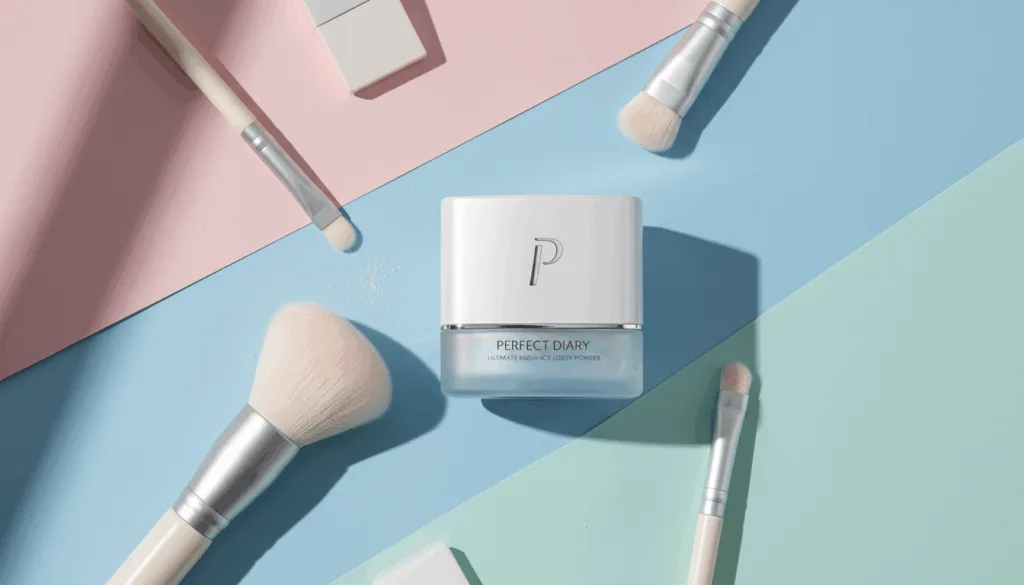
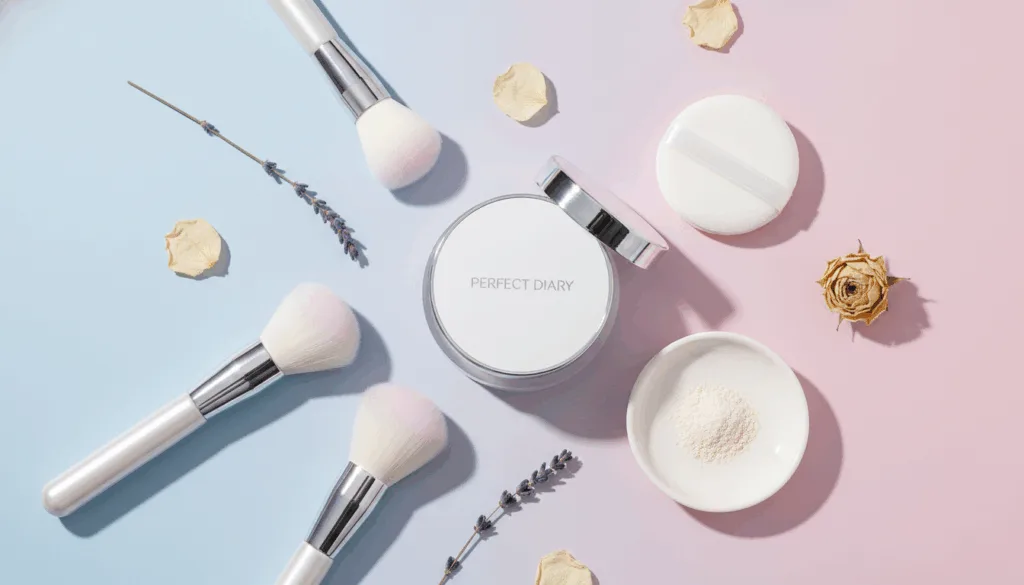
Have you seen the Douyin viral beauty product everywhere? It’s the Perfect Diary Loose Powder. People love it for controlling oil and feeling light on the skin. But is it really worth all the buzz?
This C-Beauty Oil Control Powder is made to keep oil at bay for hours. It’s a big deal for those with oily skin. We’ll check out how it works, feels, and compare it to Western powders.
Key Takeaways
Effective oil control for up to several hours
Lightweight texture suitable for oily skin
Comparison to popular Western setting powders
Analysis of its performance in humid environments
Assessment of its value for money
How to Understand What Makes Perfect Diary Loose Powder Special
Perfect Diary Loose Powder is special because of its formula, packaging, and social media fame. It’s a hit among those with oily skin. This is because it has an oil-control formula and a translucent finish.
The Science Behind Its Oil-Control Formula
The Perfect Diary Loose Powder’s oil-control formula is unique. It absorbs excess oil without clogging pores. This gives a matte finish that lasts all day, even when it’s humid.
Packaging Quality and Shade Options
The packaging of Perfect Diary Loose Powder is both useful and stylish. It comes in a compact case with a mirror and applicator. This makes it easy to touch up on the go. The powder is available in several shades to match different skin tones, ensuring a natural look.
Shade
Description
Skin Tone Suitability
Translucent
Universal shade that doesn’t alter skin tone
All skin tones
Natural
Matches most natural skin tones
Fair to medium
Medium
Slightly deeper shade for those with medium skin tone
Medium to tan
Why It’s Going Viral on Douyin and Xiaohongshu (RED)
Perfect Diary Loose Powder is a hit on Douyin and Xiaohongshu. People love how it controls shine and sets makeup for hours. Its popularity comes from its effectiveness, price, and the marketing by Perfect Diary.
How to Apply Perfect Diary Loose Powder for Maximum Benefits
Learn how to use Perfect Diary Loose Powder for a lasting, oil-free look. The right prep and application are key to getting the most out of it.
Step 1: Preparing Your Skin Based on Your Skin Type
Before you start, make sure your skin is ready. If you have oily skin, use a light moisturizer and primer. This makes your skin smooth. For dry skin, hydrate well before you put on makeup. Perfect Diary Loose Powder works on many skin types, but better prep makes it even better.
Step 2: Application Techniques for Blurring Pores
To hide pores, use a bit of Perfect Diary Loose Powder with a fluffy brush or puff. Lightly dust it on your nose, forehead, and chin. This makes your skin look smooth and matte.
Step 3: Setting Strategies for 4-8 Hour Oil Control
For long-lasting oil control, apply a thin layer of powder all over your face. Use a light touch to avoid a cakey look. This keeps your skin looking fresh all day. The oil-control formula in Perfect Diary Loose Powder keeps your skin matte for hours.
Step 4: Touch-Up Methods for Extended Wear
As the day goes on, you might need to touch up your makeup. Use a compact mirror and a small puff to dust Perfect Diary Loose Powder on your T-zone. This keeps your makeup looking good and oil-free.
By following these steps, you can get the most out of Perfect Diary Loose Powder. Enjoy its benefits of blurring pores and controlling oil for hours.
Perfect Diary Loose Powder Review: How It Compares to Western Brands
The beauty world is full of loose powders, but how does Perfect Diary compare? When choosing makeup, knowing the differences between Perfect Diary and Western brands is key.
Texture Comparison: Lightweight vs. Heavy Formulas
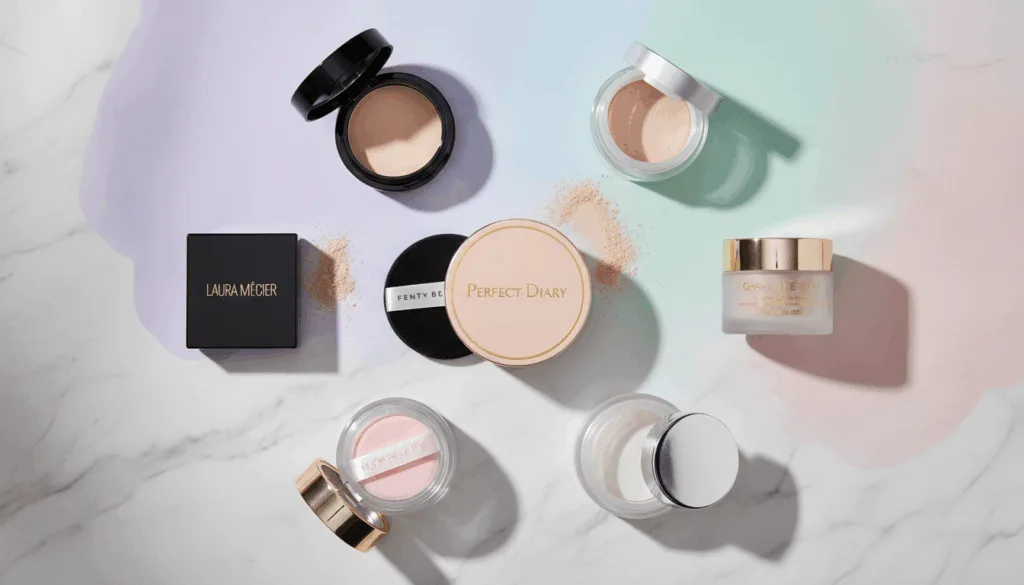
Perfect Diary Loose Powder is light and airy. It’s similar to Laura Mercier’s powder but costs less. Maybelline Fit Me is a bit heavier, which might not be good for oily skin.
Performance Analysis Against Laura Mercier and Maybelline Fit Me
Perfect Diary performs well against Western brands. It controls oil for up to 8 hours, just like Laura Mercier. Maybelline Fit Me also controls oil, but it can cake on skin after a few hours.
Price-to-Performance Ratio vs. Fenty Beauty Pro Filt’r
Perfect Diary is a great deal. It’s cheaper than Fenty Beauty Pro Filt’r but offers similar quality. This makes it a smart choice for those watching their budget. Here’s a comparison:
Brand
Price
Oil Control
Texture
Perfect Diary
$10
Up to 8 hours
Lightweight
Fenty Beauty Pro Filt’r
$35
Up to 8 hours
Silky
Laura Mercier
$30
Up to 8 hours
Weightless
Results for Different Skin Types: Oily, Combination, and Dry
Perfect Diary Loose Powder works for many skin types. It’s great for oily skin because it controls oil well. Dry skin likes it because it’s gentle.
“Perfect Diary Loose Powder is a game-changer for oily skin; it keeps my face matte all day without drying out my skin.”
In summary, Perfect Diary Loose Powder is a strong choice. It’s light, controls oil well, and is affordable. It’s a top pick in the market.
Conclusion: Who Should Buy Perfect Diary Loose Powder
Looking for a setting powder that gives you a flawless, matte finish? Perfect Diary Loose Powder is a great choice. It controls oil and feels light on your skin, perfect for oily or combination skin.
Many reviews say it’s affordable and works well to control shine. It’s a top pick for 2021. It’s great for everyday use, especially in humid places.
Buy Perfect Diary Loose Powder if you want a setting powder that’s reliable. It won’t cake or feel heavy. It’s as good as high-end brands like Laura Mercier and Fenty Beauty but cheaper.
Perfect Diary Loose Powder is a must-have for your makeup routine. It gives long-lasting, flawless coverage. It’s a key product for anyone who wants flawless skin.
FAQ
What is Perfect Diary Loose Powder?
Perfect Diary Loose Powder is a top pick for controlling oil. It gives you a matte finish that lasts all day.
Is Perfect Diary Loose Powder suitable for oily skin?
Yes, it’s perfect for oily skin. It also works well for combination skin.
How do I choose the right shade of Perfect Diary Loose Powder?
Pick a shade that matches your skin tone. This ensures a natural look.
How do I apply Perfect Diary Loose Powder?
Use a powder brush or puff. Gently sweep it over your face to set your makeup.
How long does Perfect Diary Loose Powder last?
It controls oil for 4-8 hours. You can touch it up as needed to keep it looking fresh.
Is Perfect Diary Loose Powder affordable?
Yes, it’s more affordable than many Western brands. It offers great value for its quality.
Can I use Perfect Diary Loose Powder on dry skin?
It’s made for oily skin, but you can use it on dry skin. Just make sure to moisturize well first.
How does Perfect Diary Loose Powder compare to other loose powders?
It’s a lightweight, oil-controlling formula. It’s on par with brands like Laura Mercier and Maybelline Fit Me.
Is Perfect Diary Loose Powder available for purchase online?
Yes, you can buy it online. It’s available on e-commerce sites and the brand’s official website.
C-beauty fans love Perfect Diary’s loose powder. But how does it stack up against Laura Mercier and Fenty Beauty? Let’s take a closer look.
与Laura Mercier的质地与持久度对比
Perfect Diary’s loose powder is known for its smooth, lightweight feel. It’s similar to Laura Mercier’s Translucent Loose Powder. Both give a natural look that lasts all day. But Perfect Diary is cheaper, making it a great choice for those watching their budget.
与Maybelline Fit Me的性价比分析
Perfect Diary beats Maybelline Fit Me in oil control at a lower price. Maybelline is popular, but Perfect Diary offers similar benefits for less money.
与Fenty Beauty Pro Filt’r的控油效果比较
Fenty Beauty Pro Filt’r is famous for its oil control. Perfect Diary’s loose powder is a close match. Both give a matte finish that lasts, perfect for oily skin.
不同场景下的表现测评
Perfect Diary’s loose powder shines in different situations:
Everyday wear: Provides a natural, matte finish.
Special occasions: Lasts throughout extended wear.
Oily skin: Controls oil effectively.
In summary, Perfect Diary’s loose powder is a tough competitor to international brands. It offers great performance at a lower price.
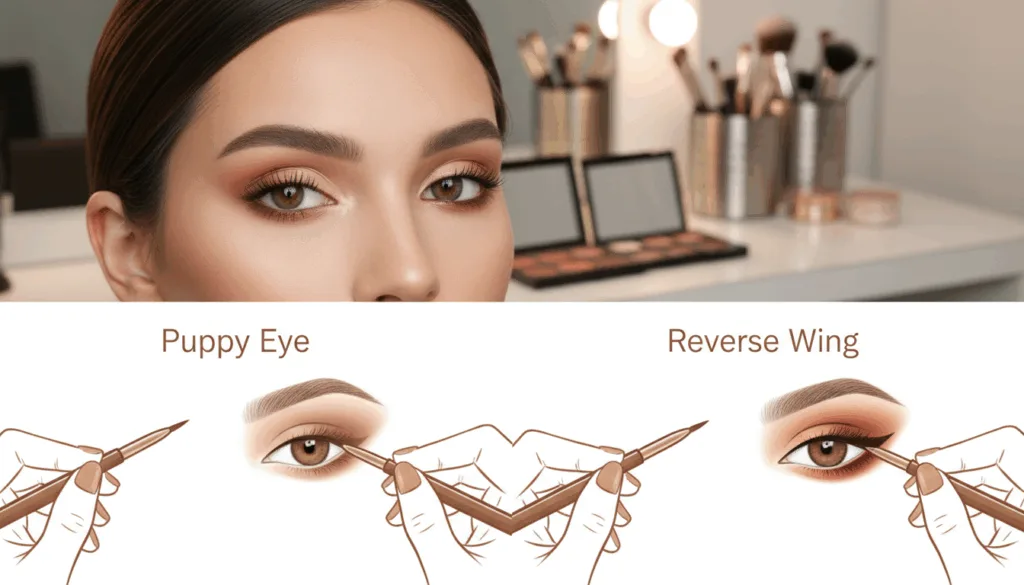
Have you seen the soft, natural look taking over social media? It’s the puppy eye and a subtle reverse wing. This look is more than a trend; it’s a versatile and flattering technique that can take your makeup to the next level.
The Douyin eyeliner trend is popular for making eyes look bigger without heavy makeup. By following the steps of top Douyin beauty influencers, you can master this viral makeup trend. You’ll be up-to-date with the latest trending eye makeup looks.
Key Takeaways
Understand the basics of the Douyin eyeliner trend
Learn how to create the puppy eye and reverse wing look
Discover how to make your eyes look bigger without heavy makeup
Follow the steps of popular Douyin beauty influencers
Stay on top of the latest trending eye makeup looks
The Viral Douyin Eyeliner Trend Explained
The Douyin eyeliner trend is more than a style; it’s a way to highlight your natural beauty. It’s loved by many for its soft, puppy eye look. This look has swept the beauty world, drawing in fans with its unique charm.
Origins and Popularity of the Soft Puppy Eye Look
The soft puppy eye look comes from Douyin makeup tutorials. It’s known for its gentle, rounded wing that slightly drops at the outer corners. This style is a hit because it makes your eyes look like a doe’s, a look many in Asia love.
This look is all about a soft eyeliner that suits many eye shapes. It’s perfect for those who want to enhance their natural beauty.
Why This Technique Flatters Monolids, Hooded and Almond Eyes
The Douyin eyeliner technique is great for monolids, hooded, and almond eyes. It gives a soft, doe-eye look that boosts the beauty of these eye shapes. Here’s how it helps different eye types:
Eye Shape
Benefit of Douyin Eyeliner
Monolids
Adds definition without creating a harsh line
Hooded Eyes
Creates the illusion of larger eyes
Almond Eyes
Enhances the natural almond shape with a soft, rounded wing
Understanding the Douyin eyeliner trend shows its value for various eye shapes. It’s a testament to its versatility and charm.
Step-by-Step Puppy Eye + Reverse Wing Tutorial
Learning the Douyin eyeliner trend is all about following steps. You’ll get the perfect puppy eye and reverse wing look. This style is trendy and suits many eye shapes.
Selecting the Right Products for Your Look
To nail the puppy eyeliner look, pick the right products. Soft pencil eyeliners or gel liners in brown or similar shades work best for a natural look. A fine-tipped brush is key for blending and smudging.
Brown vs. Black Liner Options
Brown liners give a softer, more natural look. Black liners are for a bolder effect. Beginners should start with brown liners.
Gel Pencils for Better Control
Gel pencils are great for precision. They’re perfect for the delicate puppy eye and reverse wing.
Creating the Downward Puppy Eye
The downward puppy eye starts with a short wing from the outer corner. Draw a line from the outer corner, angling it downwards.
Sketching the Short Downward Wing
Sketch a short, gentle line from the outer corner downwards with your gel pencil.
Connecting to the Lash Line
Connect the wing to your lash line smoothly. This ensures a fluid look.
Mastering the Subtle Reverse Wing
The reverse wing adds elegance to your look. Focus on creating a soft angle at the inner corner of your eye.
Adding the Inner Corner Point
Add a tiny point at the inner corner to define the reverse wing.
Smudging Techniques for a Blurred Finish
Smudge the liner with a fine-tipped brush for a soft finish.
Troubleshooting Common Mistakes
Common mistakes include uneven wings and harsh lines. Practice and the right tools can help avoid these.
Common Mistake
Solution
Uneven Wings
Use a guide or stencil for even wings.
Harsh Lines
Smudge the liner for a softer look.
Completing Your Douyin-Inspired Makeup Look
Now that you’ve learned the puppy eye and reverse wing, it’s time to finish your Douyin makeup. Add soft lashes and glossy lids for a fresh look.
The brown eyeliner trend is all about being subtle. Balance your eye makeup with natural lip colors and soft blush. Try gradient lips for a trendy twist.
To elevate your makeup, check out Douyin makeup tutorials. They show the latest . Follow these tips to create a stylish look that will surely impress.
FAQ
What is the Douyin eyeliner trend?
The Douyin eyeliner trend is a makeup style that’s gone viral. It’s all about a soft puppy eye look with a reverse wing. You can find it on Douyin, a popular social media platform.
How do I achieve the puppy eye look?
To get the puppy eye look, apply eyeliner downwards. This creates a soft, subtle effect. You can use liquid or pencil eyeliner, whichever you prefer.
What are the benefits of the soft puppy eye look for different eye shapes?
The soft puppy eye look suits many eye shapes. It looks great on monolids, hooded eyes, and almond eyes. It makes your eyes look beautiful without being too bold.
What products do I need for the Douyin eyeliner trend?
For the Douyin eyeliner trend, you’ll need eyeliner, a makeup brush, and maybe false lashes or mascara. These help enhance your lashes.
How do I create a reverse wing?
To make a reverse wing, apply eyeliner upwards from the outer corner of your eye. It takes practice, but it’s worth it for a unique look.
Can I customize the Douyin eyeliner trend to suit my personal style?
Yes, you can make the Douyin eyeliner trend your own. Add soft lashes, glossy lids, or gradient lips to match your style. This way, you get a makeup look that’s both trendy and personal.
Are there any common mistakes to avoid when trying the Douyin eyeliner trend?
Yes, avoid applying too much eyeliner and not blending it well. Also, don’t forget to follow your eye’s natural shape. Practice and adjust your technique to fix these mistakes.
Is the Douyin eyeliner trend suitable for beginners?
Yes, beginners can try the Douyin eyeliner trend with practice and patience. Start with online tutorials and keep practicing until you feel confident.